Hello everyone, we are going to release a new version of B50, the following are the changes and fixes of B50.
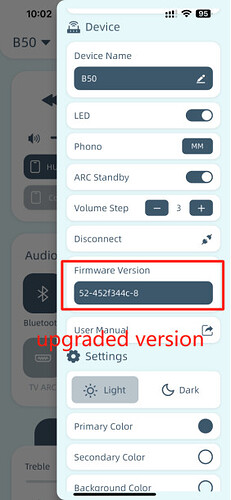
This time, we will release the new firmware of B50: 52-452f344c.
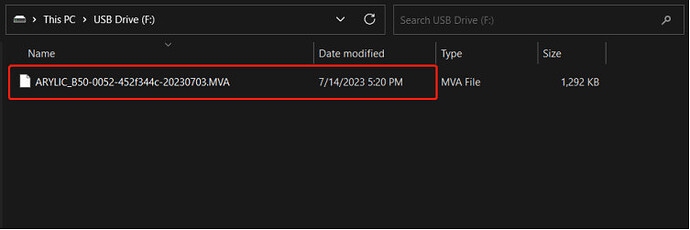
I will put the firmware version below; everyone downloads the firmware to the computer, unzips it, and imports it into the USB disk.
52-452f344c changes :
-
Fix the issue that there are subdirectories in the USB disk, which causes the USB disk to crash after switching modes and playing.
-
Fix the issue if the USB disk directory is too long and you switch modes, the system will crash.
-
Fixed some communication problems with GO CONTROL APP.
-
Support USB disk in FAT32 format.
-
Support new GO CONTROL APP features. (Version 1.2.8)
How to upgrade the firmware version:
The upgrade steps are very simple. The steps are as follows:
1、Download the firmware version to the computer on the forum and decompress it.
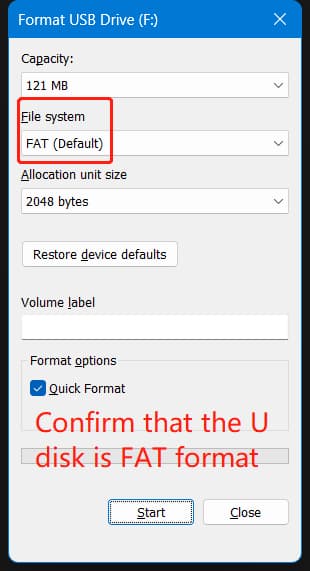
2、Import the decompressed firmware onto the USB disk. The USB disk format must be FAT for upgrading. We have solved this problem in the version after this upgrade.
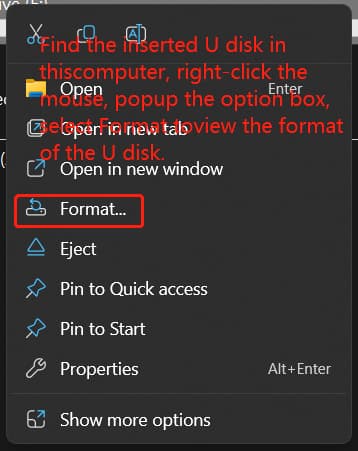
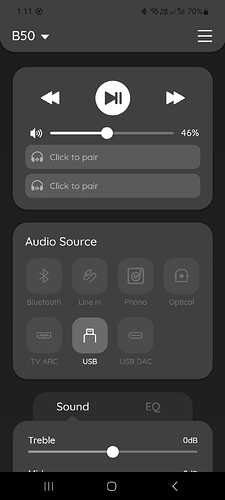
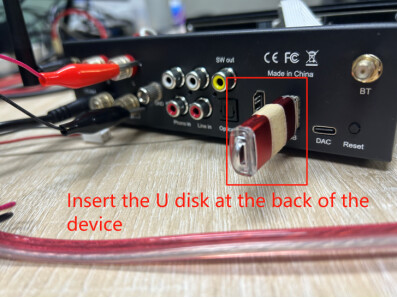
3、Insert the USB disk that imported the firmware into the USB disk interface of the B50, and the device will automatically switch to USB disk mode.
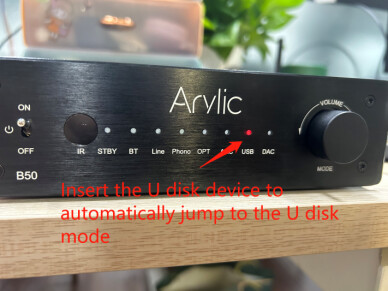
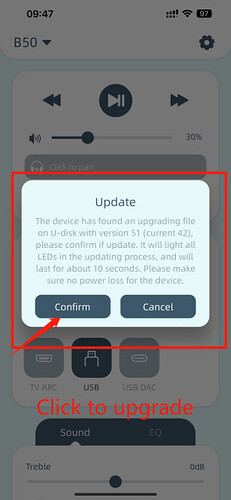
4、Open our GO CONTROL APP to connect the device. After the connection is successful, the App will pop up a prompt that says it needs to be upgraded.
5.Click Upgrade, and all LED lights on the B50 will light up. This process lasts about 10 seconds. After the upgrade is complete, the Bluetooth light flashes quickly, the device restarts, and the upgrade is complete.
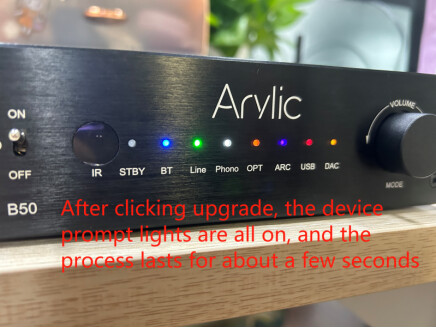
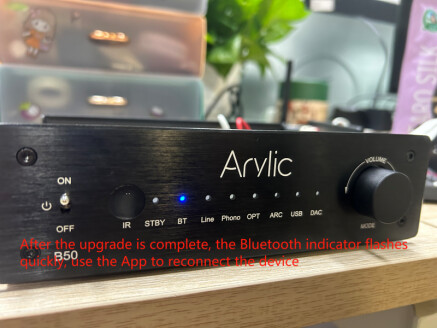
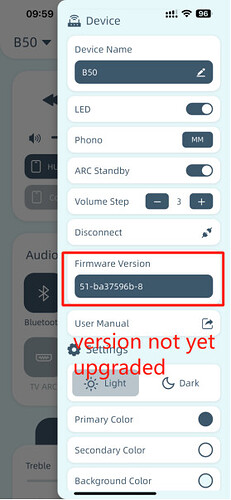
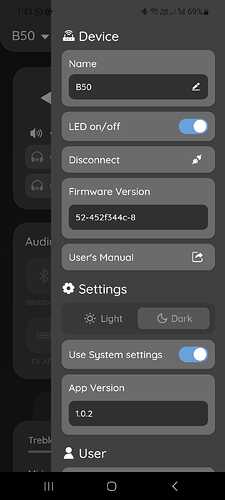
6. Open the GO CONTROL APP to reconnect the device, and click Settings to view the device version number; if there is any change, the upgrade is successful.
Format USB Flash Drive to FAT/FAT16(not FAT32) 07/25.2023 Update:
Hello everyone, I’m Joia,I think many friends don’t know how to convert a USB flash drive to a 4GB FAT format USB flash drive. Let me explain to my friends:
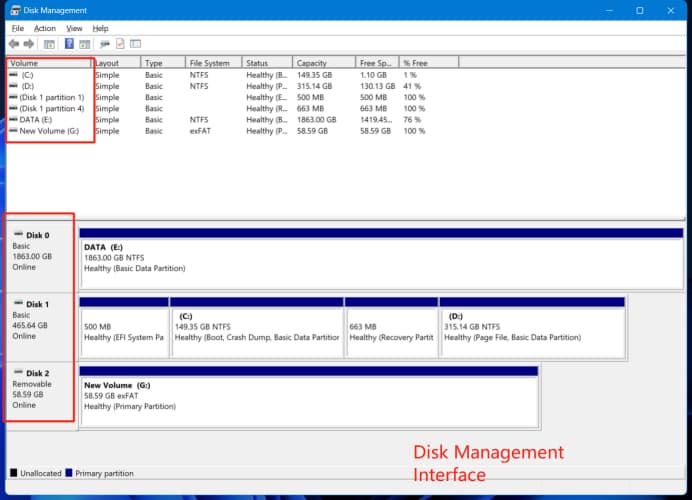
1、Turn on the computer, find the Windows button on the computer keyboard, or the Windows icon on the computer taskbar, right-click the mouse, display the computer properties, then find the “Disk Management” option and click it, we will enter the disk management interface.
As follows:
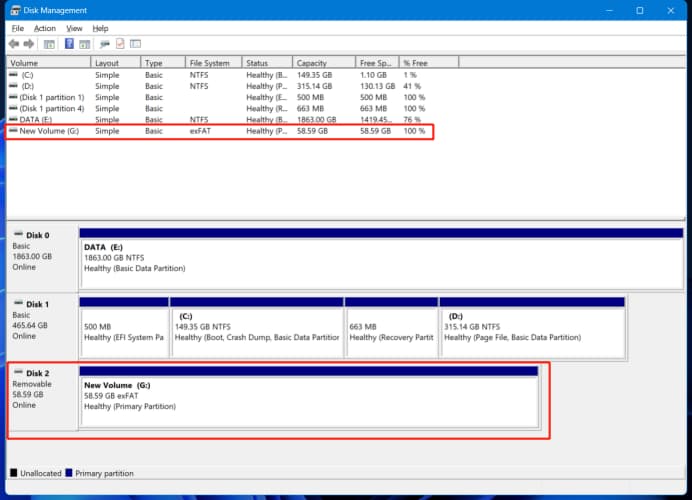
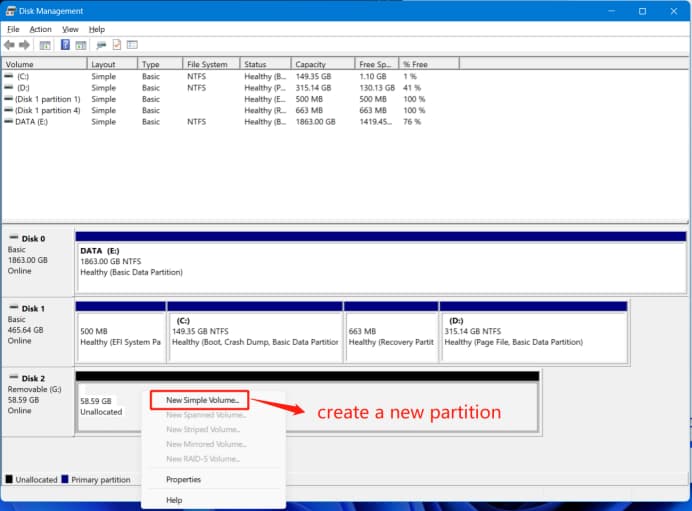
2、After entering the disk management interface, insert the U disk. Of course, you can also insert a USB flash drive before entering the disk management interface. Next, we can partition the U disk. (Pay attention to the location of the U disk, do not choose the wrong disk, so as not to affect the internal disk of the computer, and check whether it can be moved. It is best to insert the U disk after entering the disk management interface, and you will clearly see the U disk that needs to be partitioned).
Beware:
- Formatting the U disk will lose all data, so backup is required;
- Don’t choose the wrong disk.
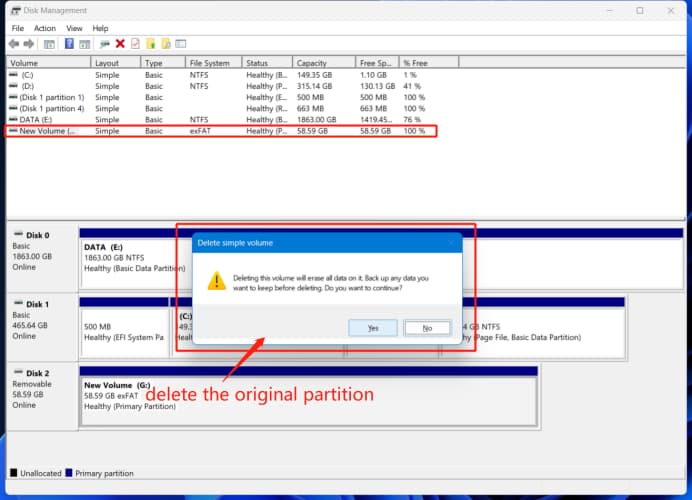
3、Find the inserted U disk, right-click to pop up a selection box, and delete the existing partition;
4、Right-click to pop up a selection box to create a new partition;
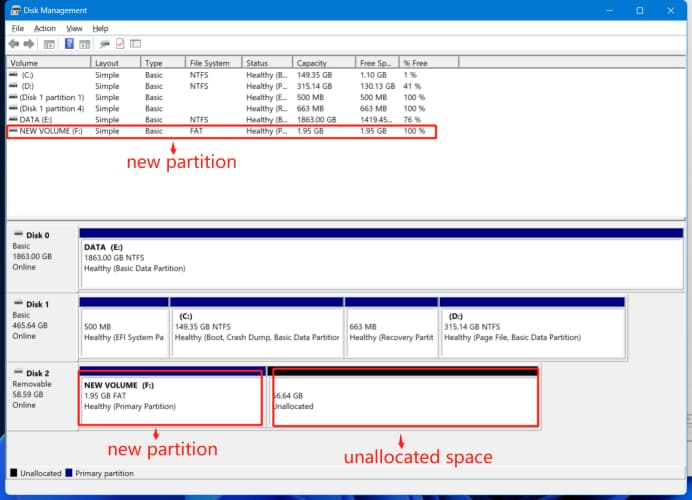
5、After clicking Yes, an option box to create a new volume will pop up. Click “Next” to jump to the interface of how many GB of USB disk to create. The newly created partition needs to be less than 4GB, we enter 2000 (about 2GB). The newly created partition has nothing to do with the size of the original disk.
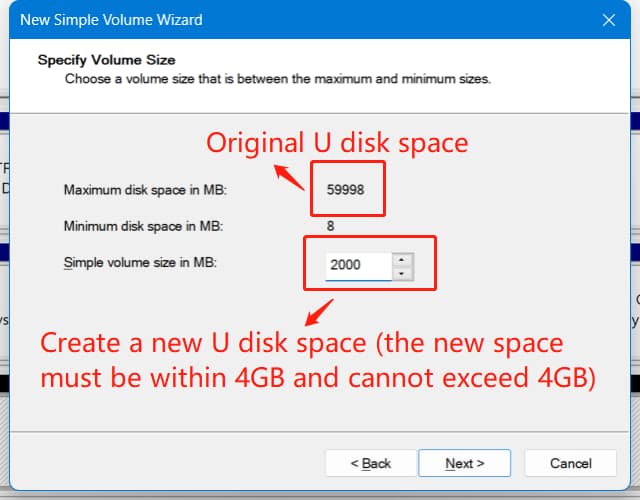
After adjusting the USB disk space, click “Next”.
6、Enter the interface of selecting U disk format,The default FAT format, directly to the next step.
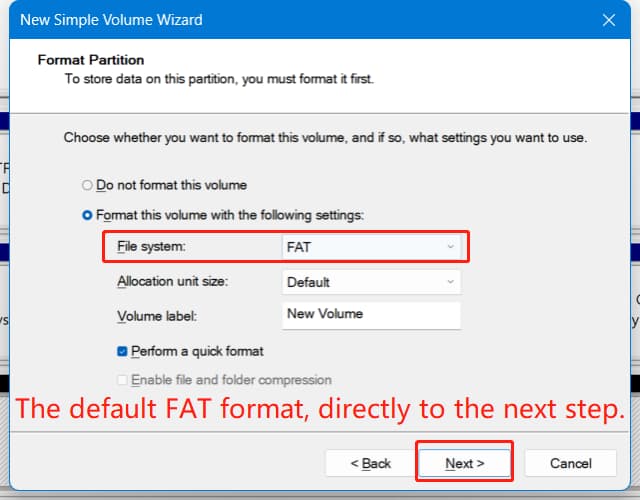
7、New partition created successfully!After the creation is complete, you can see the newly created partition, and the black part is the unallocated disk space.
If you have any other questions, please leave a message.
