Here is a completed a project where I refurbished a 1970s Hitachi SR-303L receiver and upgraded it to include the Up2stream Mini V3.

The 1970s Hitachi receivers aren’t the most popular brand on eBay so sell quite cheaply, especially if not working. The build quality is actually pretty good considering the vintage, and certainly the components, PCB and documentation are better than some I’ve worked on.
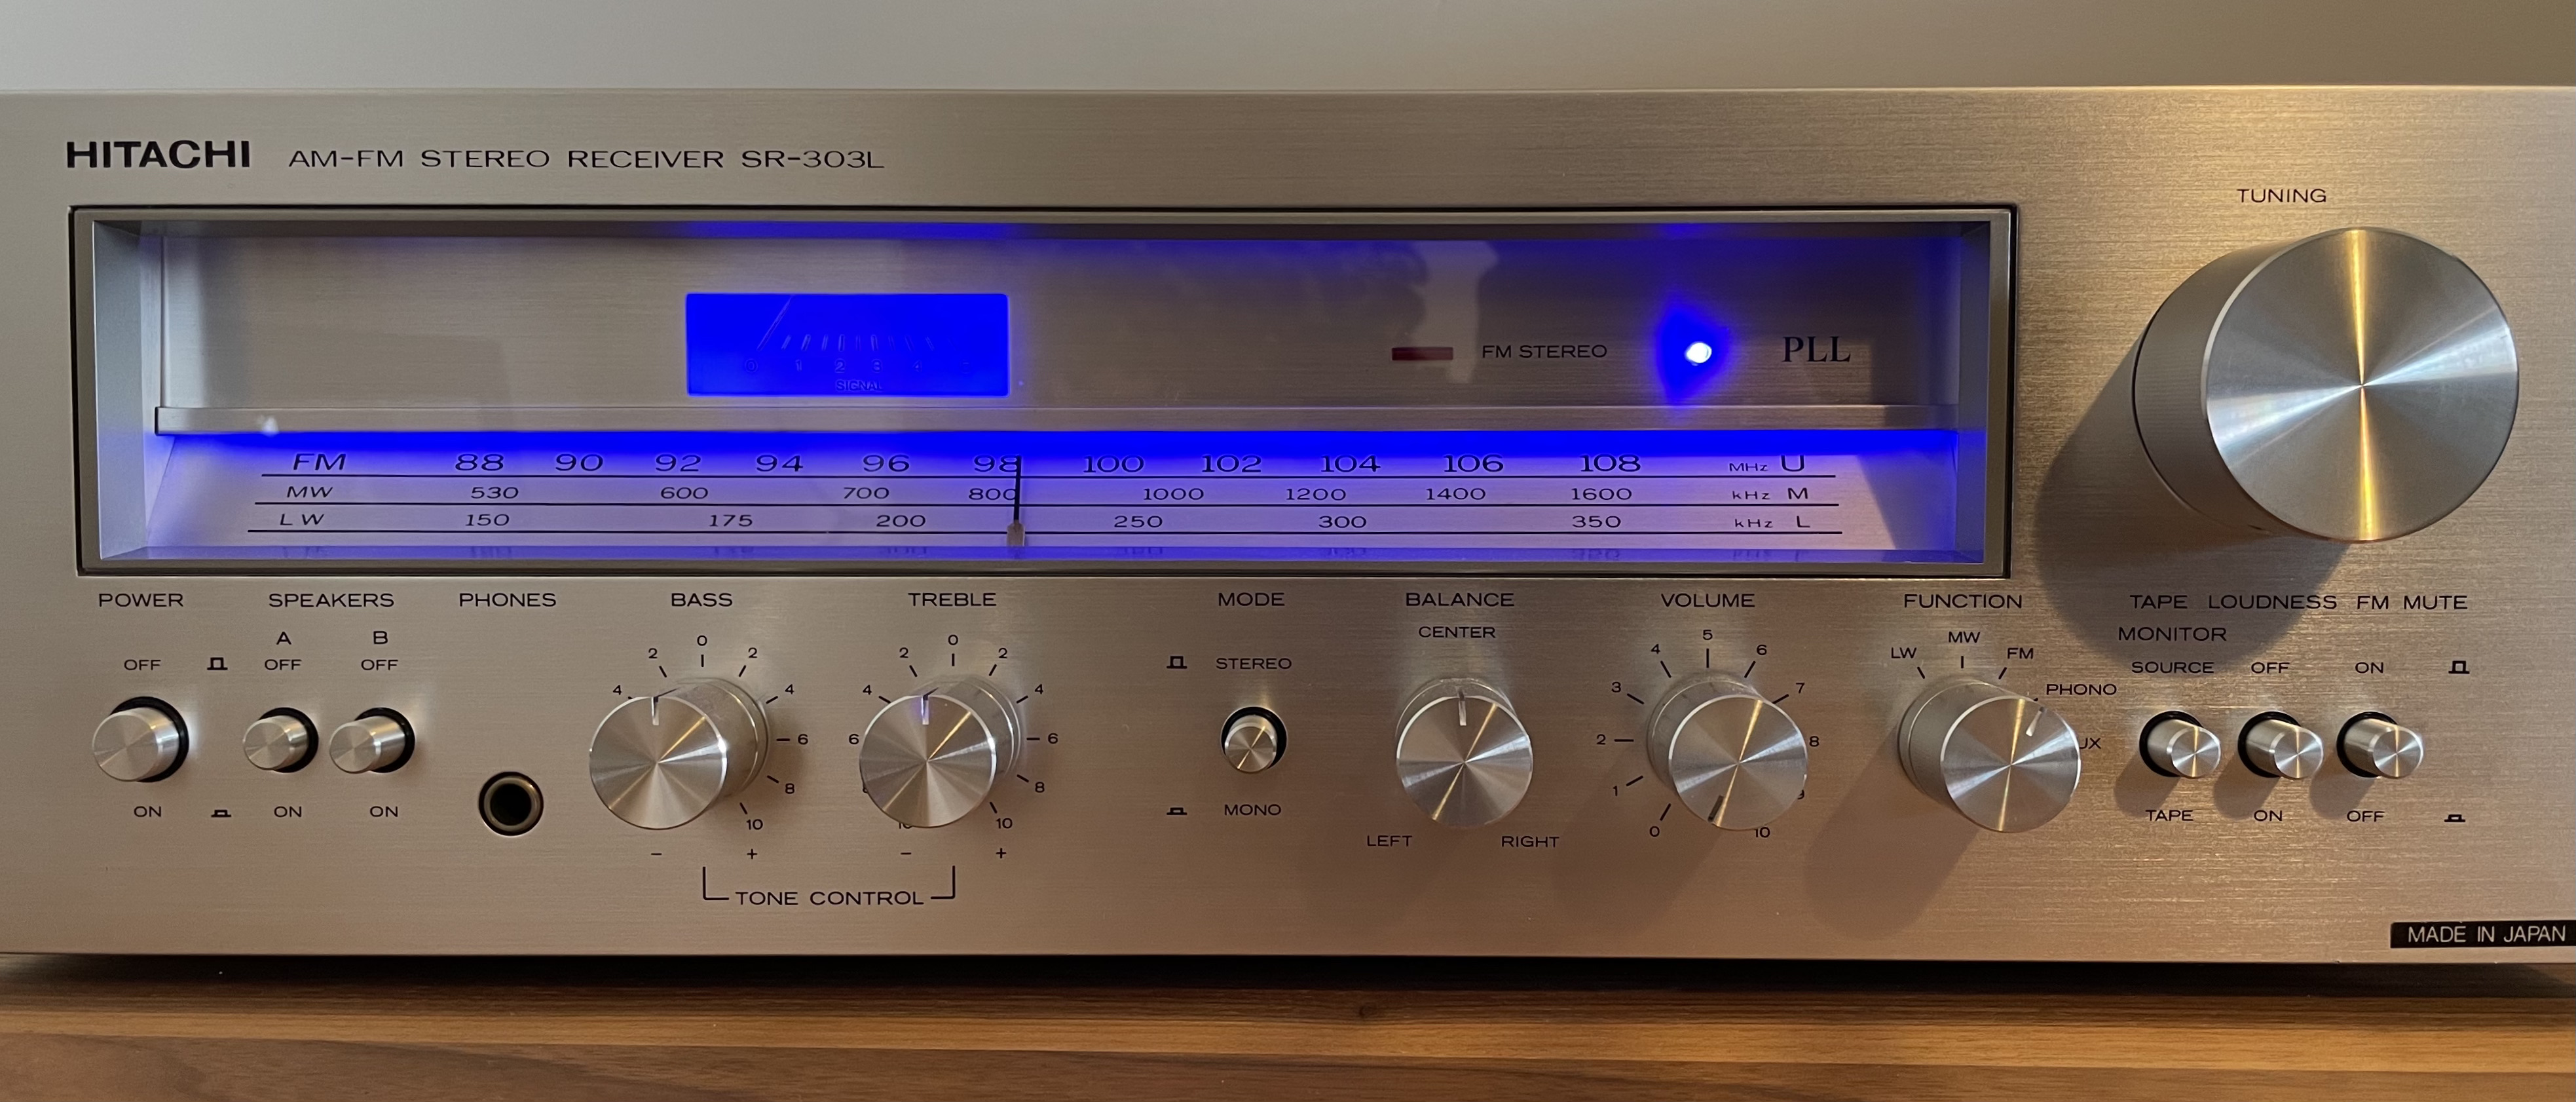
I firstly stripped the unit down and then cleaned out all the dust and dirt. It makes working on it much more pleasurable and looks a more professional job when put up for sale. I also carefully cleaned all the knobs and facia, and the rest of the chassis. You can see from the photo below it came up like new.
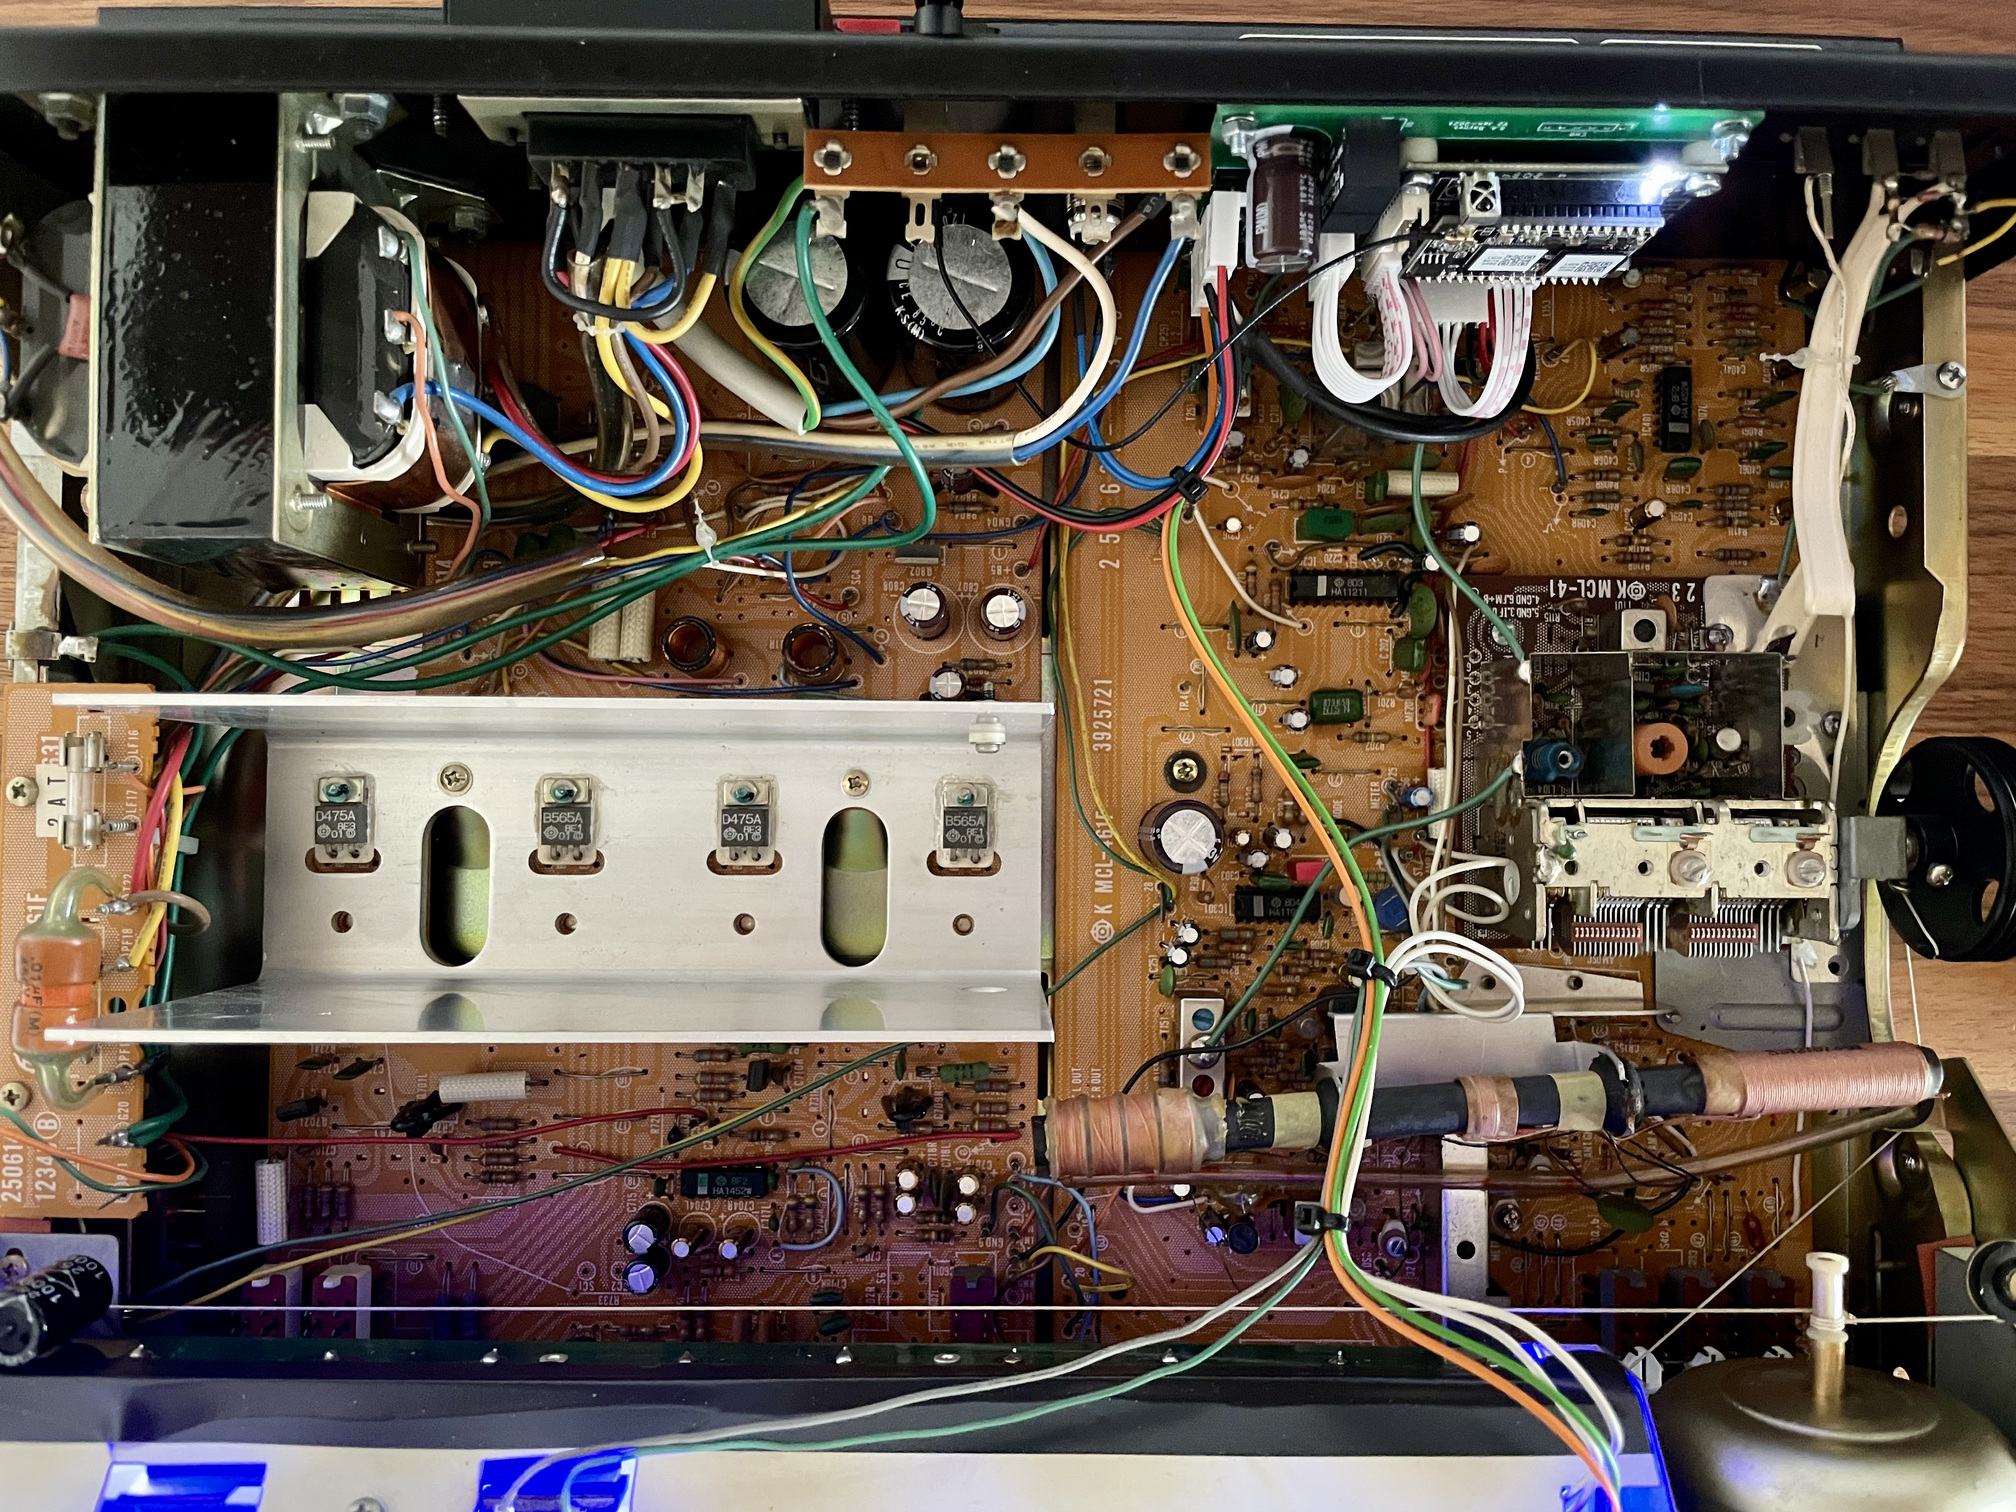
I visually inspected both the component side and solder side as sometimes burned out, failing components or dry joints can be seen.
This Hitachi SR-303L doesn’t have many electrolytic capacitors, so on this project I did a full recap using genuine Nichicon components. As usual I selectively used the Fine Gold (UFG) variety in the audio path, even though I cannot actually measure or hear any audible difference between using those or lower spec parts.
After fault finding, I replaced the output stage transistors and following a long warm up checked the bias and DC offset. Unlike some, the SR-303L doesn’t have any trimmer adjustments, but that doesn’t mean you shouldn’t check all is well. Of course, selective resistors can be swapped to sort out any inconsistencies.
Pots and switches were treated with a small amount of Deoxit F5 or D5 respectively and exercised to ensure they are noise free.
The tuner was fully aligned using stereo RF signal generator and in accordance with the service manual.
Some of the incandescent lamps had failed so on this project I tried various LEDs and decided to use blue. It looks fabulous - the photos don’t really do it justice. A blue LED was wired into the Up2stream Mini V3 to signal when it’s connected to WiFi.
On this project, I decided to connect the Up2stream Mini V3 audio output into the tape monitor circuit as that’s the least likely to be used. I modified the SR-303L to disconnect the relevant RCA sockets on the rear panel and internally connected two screened cables for left and right.
[I previously designed and manufactured a motherboard for the [Up2stream Mini V3](Wifi Audio Receiver with Multi zone Control-Arylic.com – arylic) which can be seen here in an earlier article here](Cambridge Audio A5 Amp with Arylic Up2stream Mini V3 Streamer). I used the same motherboard arrangement in this project, instead mounting the streamer on the back panel.
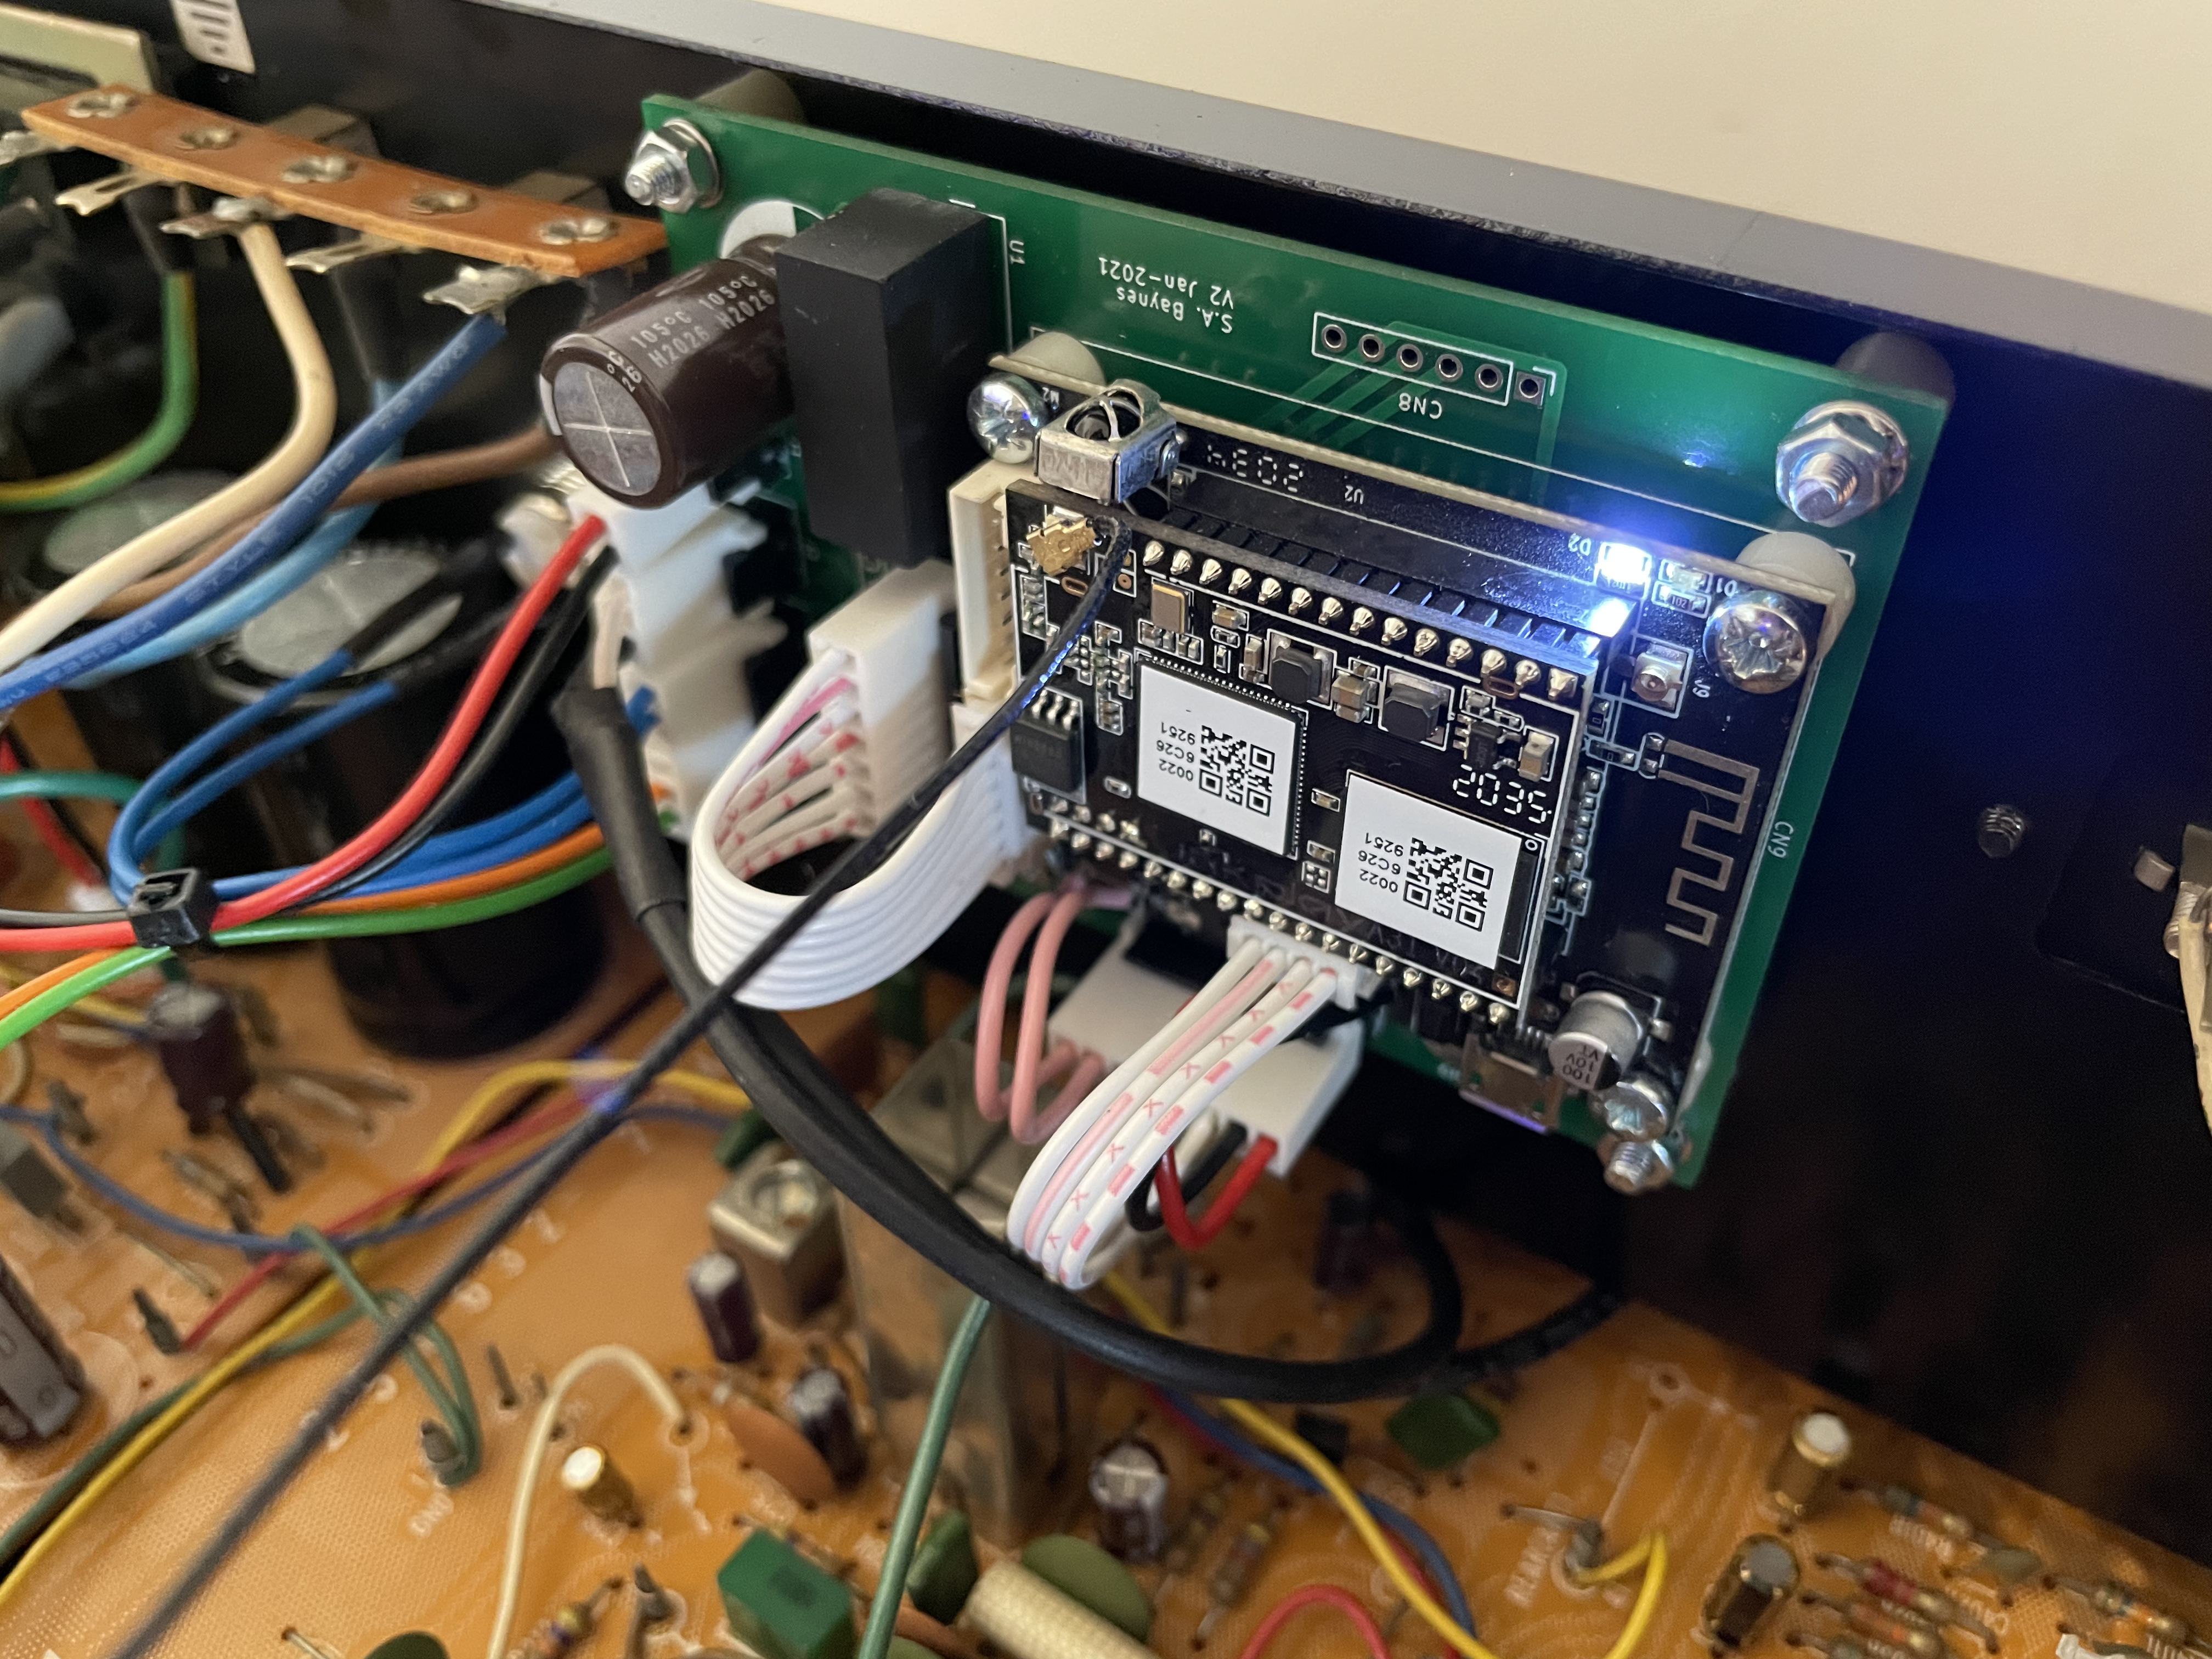
Power was taken from the main DC power rails on the SR-303L. My motherboard design has a DC-DC converter that accepts up to 75V so is pretty versatile. The two screened audio cables can be seen in the photo above.
As this Hitachi SR-303L includes AM and FM tuner and a phono stage I was wary of EMC issues so even though the case is wood, I decided to mount an external WiFi antenna on the back panel, near to the reset / WPS button. I did experiment with the stick on aerial but there was too much RFI in the phono stage.

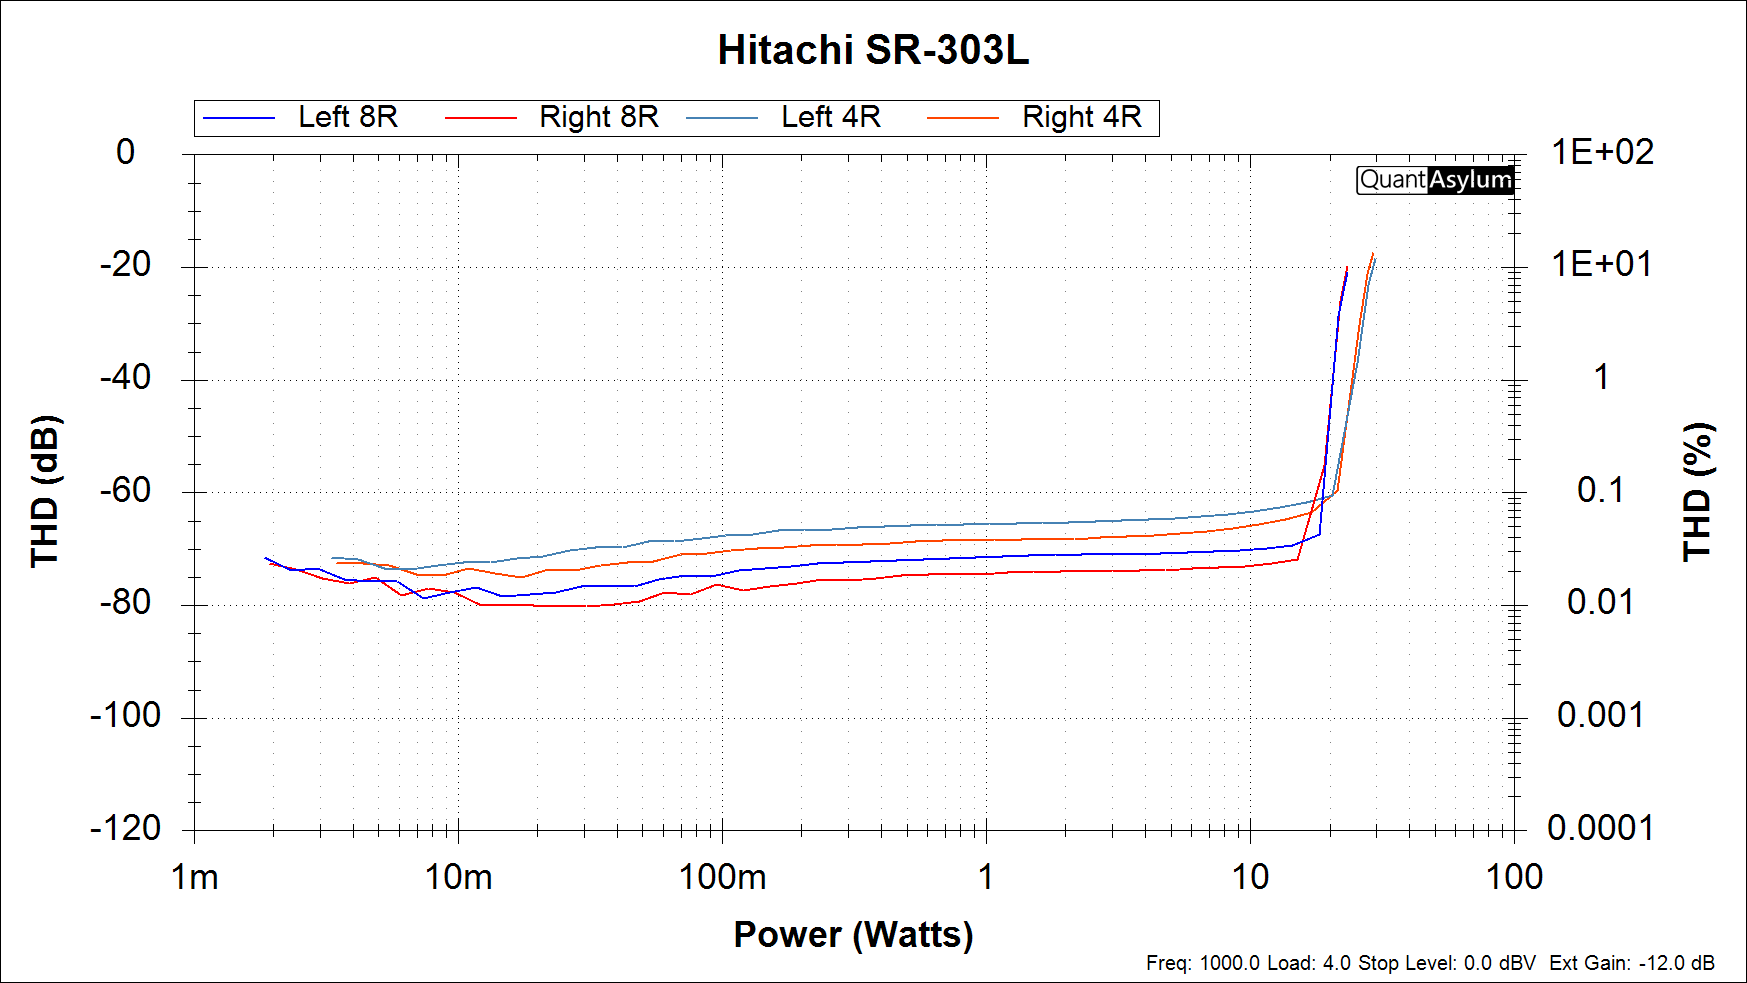
I always performance test at the end to ensure all is well as sometimes there are things wrong that can’t be detected by ear. This receiver is rated at 15 watts per channel into 8Ω (stereo) with 0.5% THD. It achieved 20W at 1% THD into 8R or 4R and distortion is <0.1% THD at 1W so better than OEM spec.
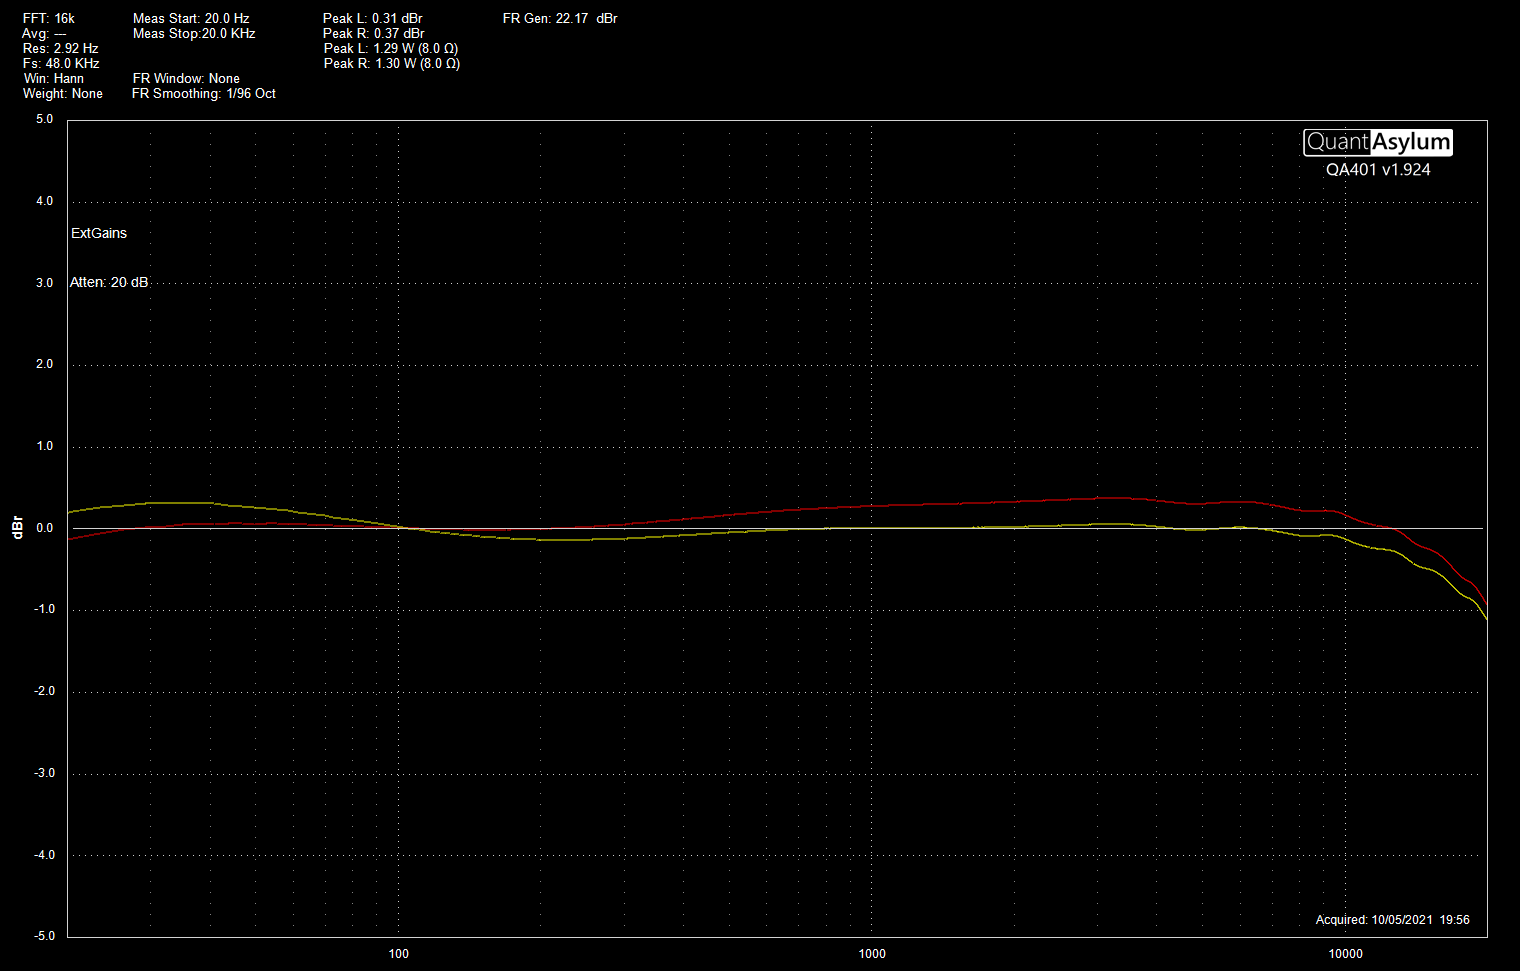
Frequency response (line input) was measured at an acceptable 20Hz - 20kHz ±1dB.
When tested with some decent speakers this Hitachi SR-303L was lovely to listen to, louder than expected, it now looks fantastic and with the addition of the Up2stream Mini V3 streamer up-cycled into the 21st Century. Success 

