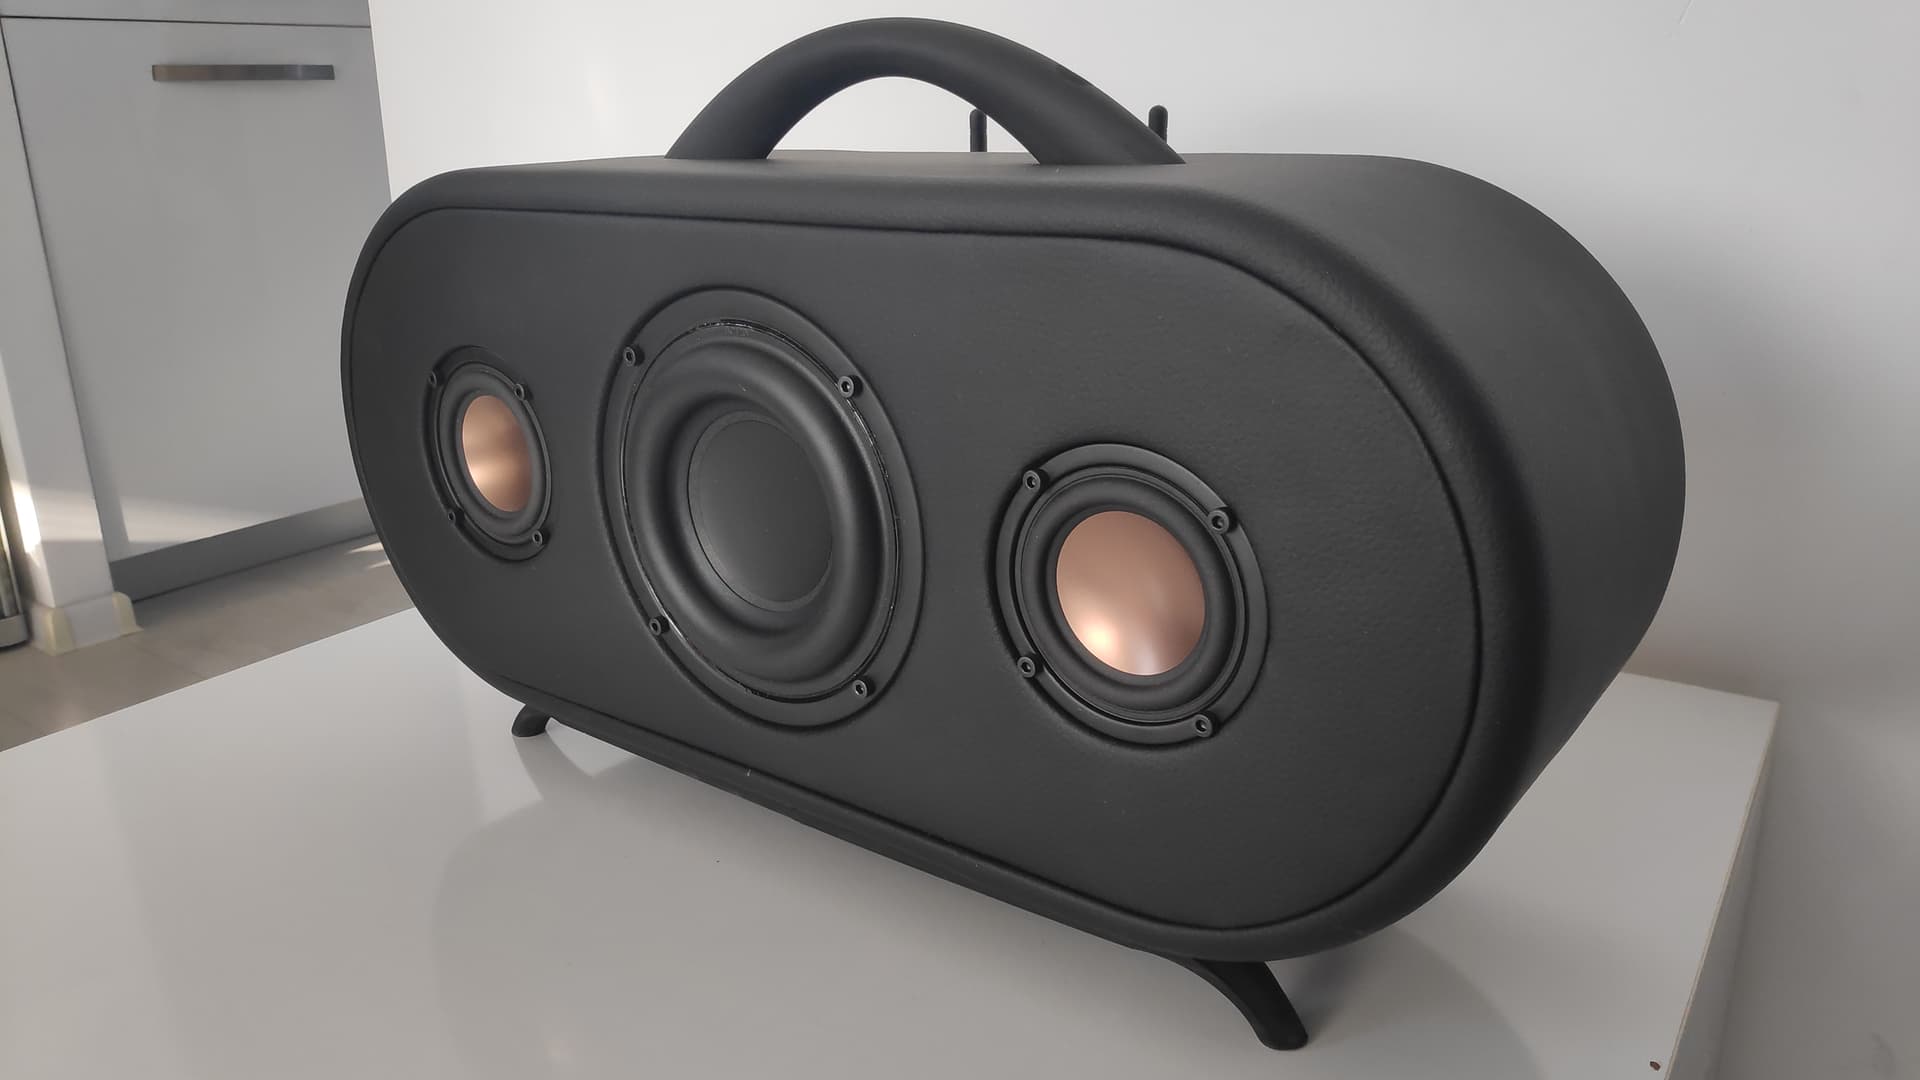
The Idea was to create something relatively portable to take out with me when camping and hiking. To do that it needs to be powered by battery and power outlet as well, slightly more than a boombox (soundwise, lookwise) at the same time make use of combination of technics (3d printing, woodworking…) to make easy on myself.
Inspired by Paul Carmody’s Isetta
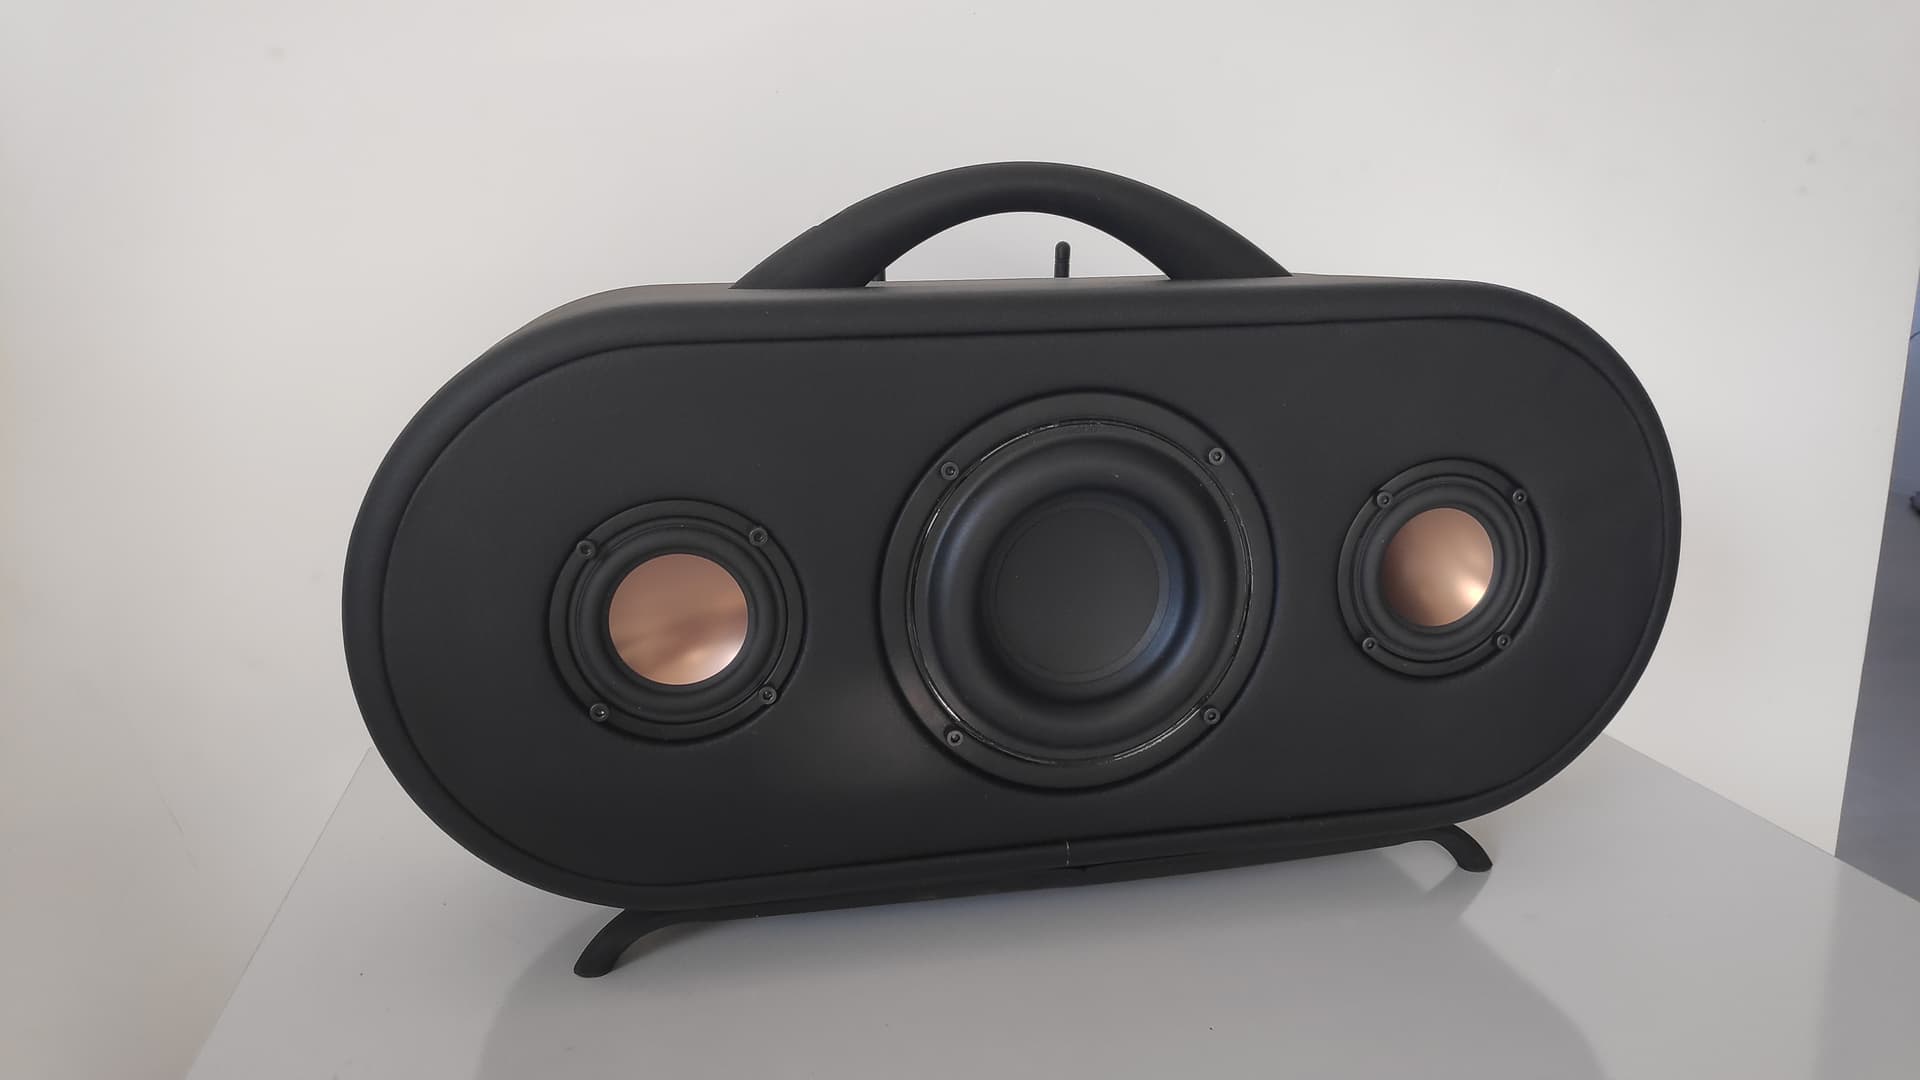
Drives:
*Full range HiVi B3N 3" as usual ![]()
*Tang Band W5-1138SMF 5-1/4" Paper Cone Subwoofer Speaker
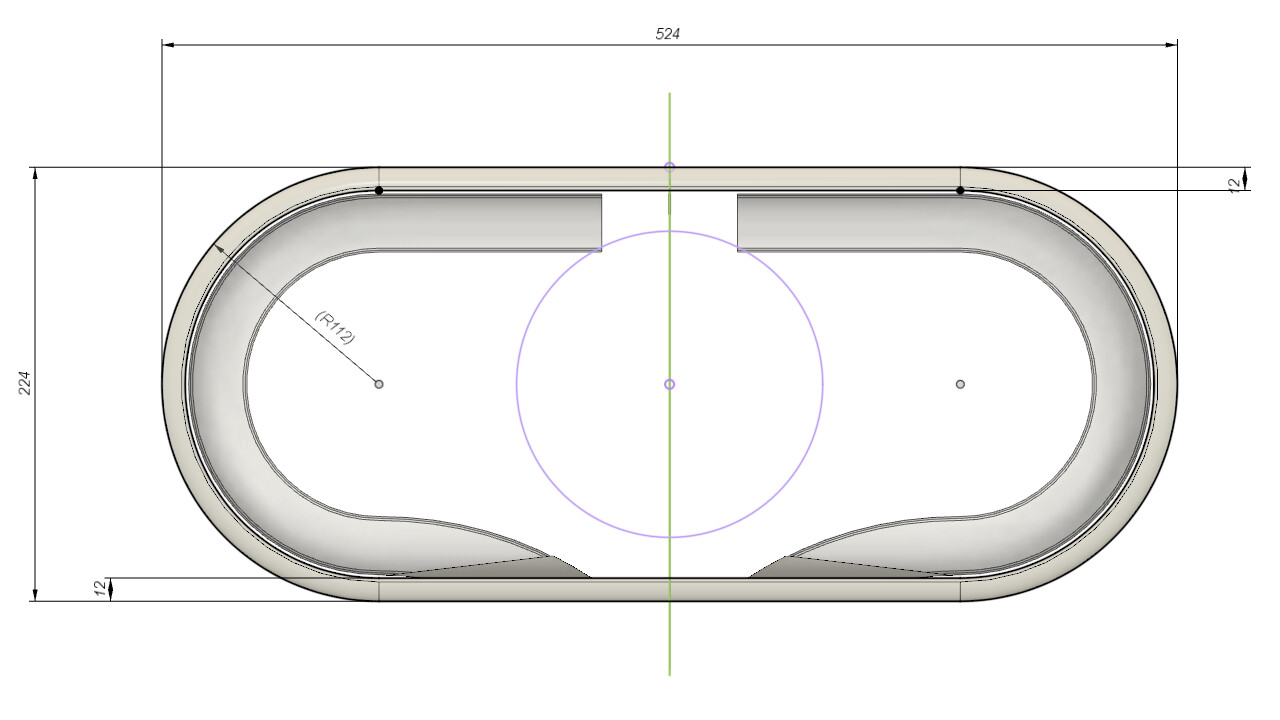
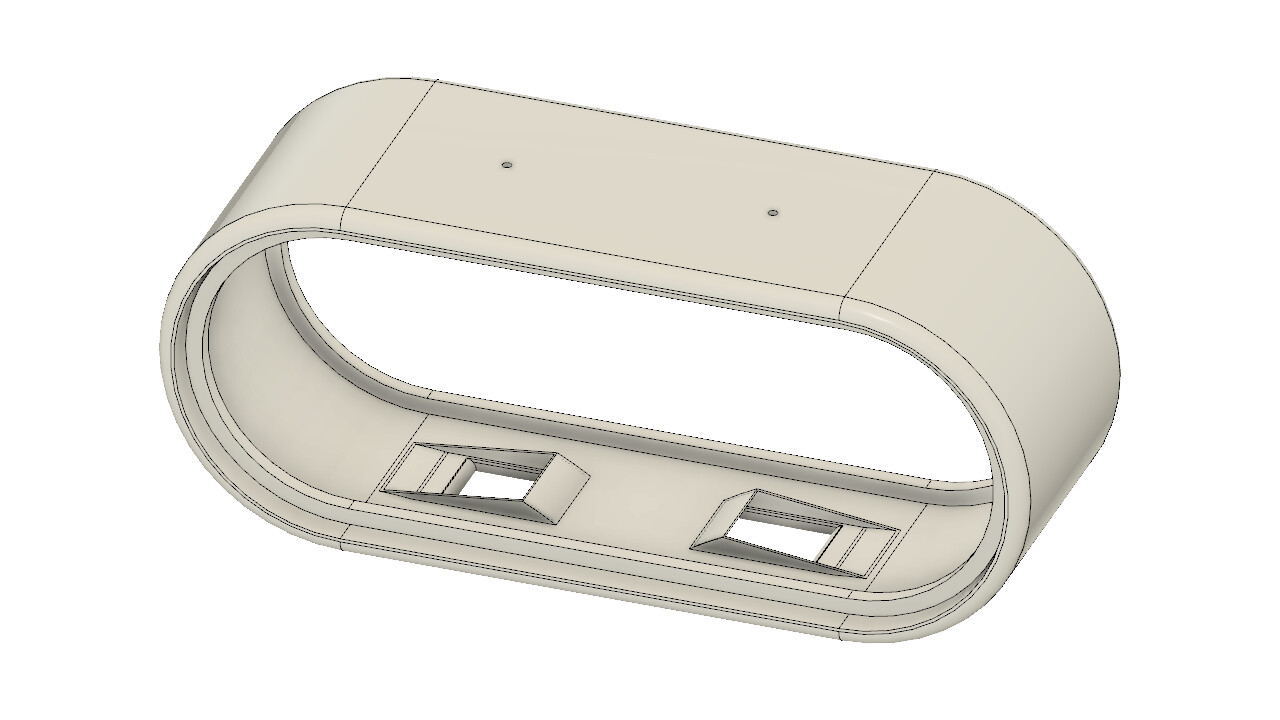
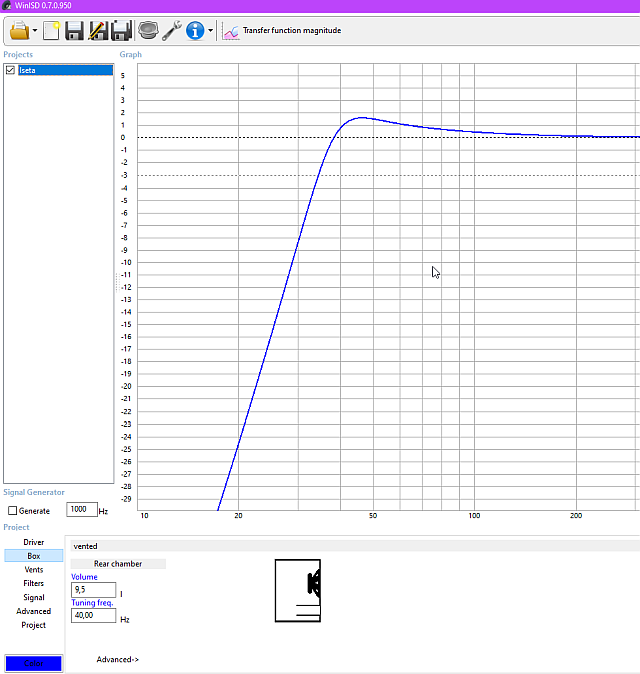
Box:
The box net volume is 9.5L and is entirely 3d printed and split in 6 part all together in order to fill it with mixture of gypsum and PVA glue 50%/50% by weight.
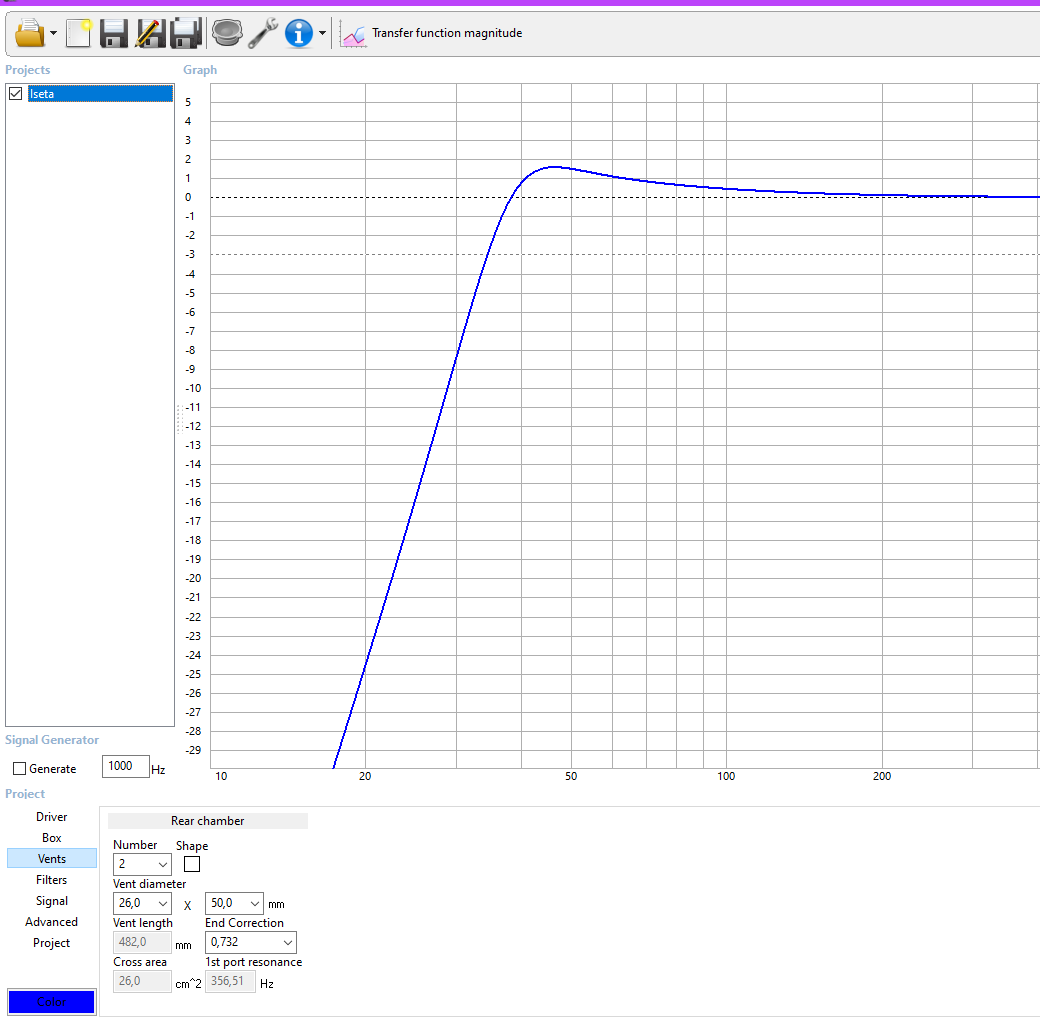
Ports:
As can be seen the ports are also printed in 3d printer with wall thickness of 2mm, they also are split lengthwise and then glued with Super Glue (CA, cyanoacrylate)

B3N:
Net enclosure for the full range is 0.65L. 3d printed cylinder with wall thickness of 12mm filled with the same mixture as the box.
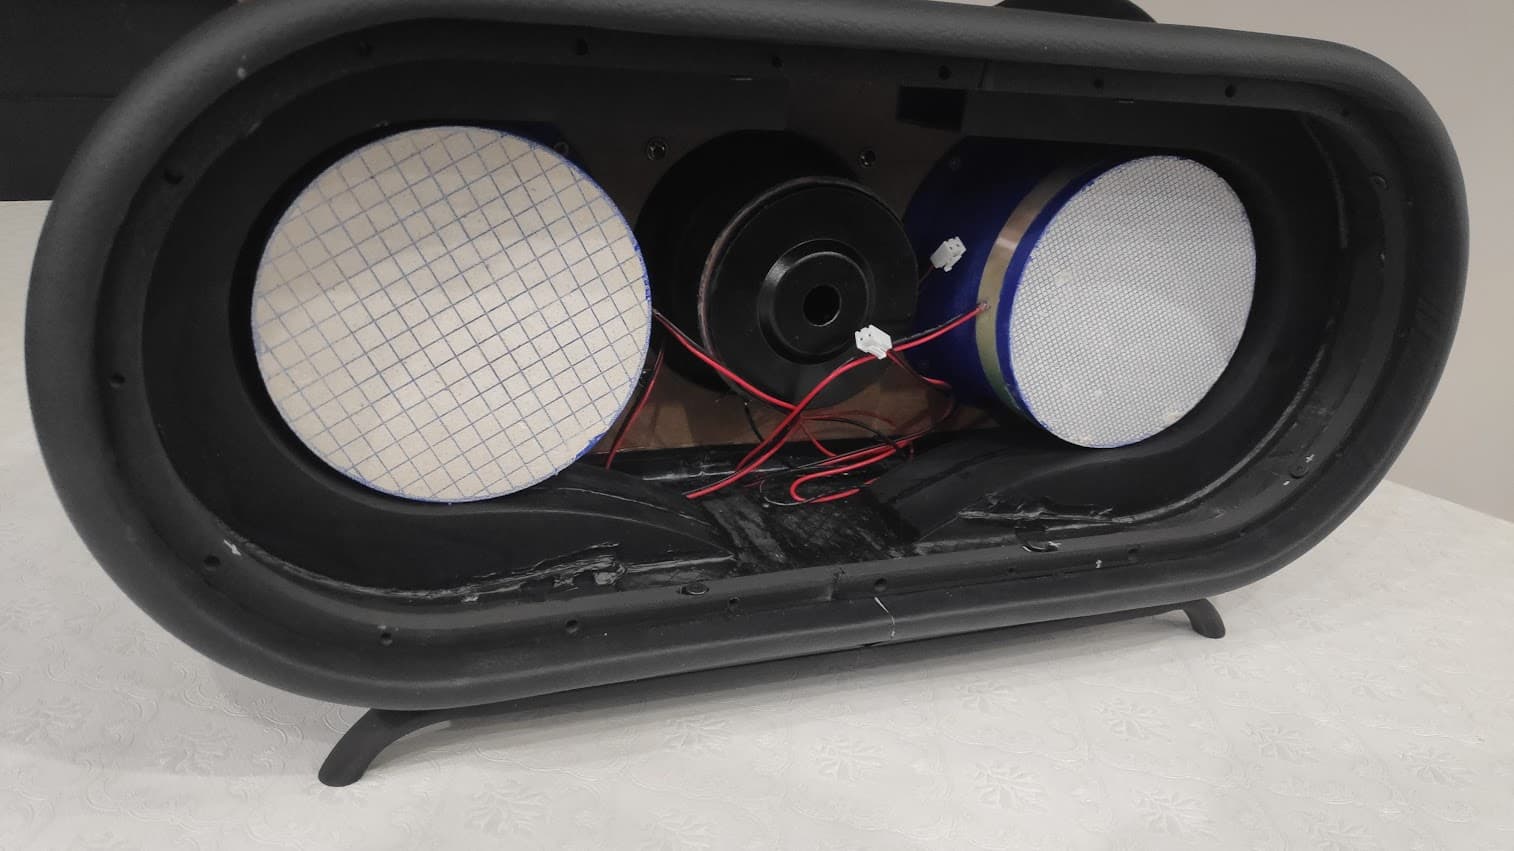
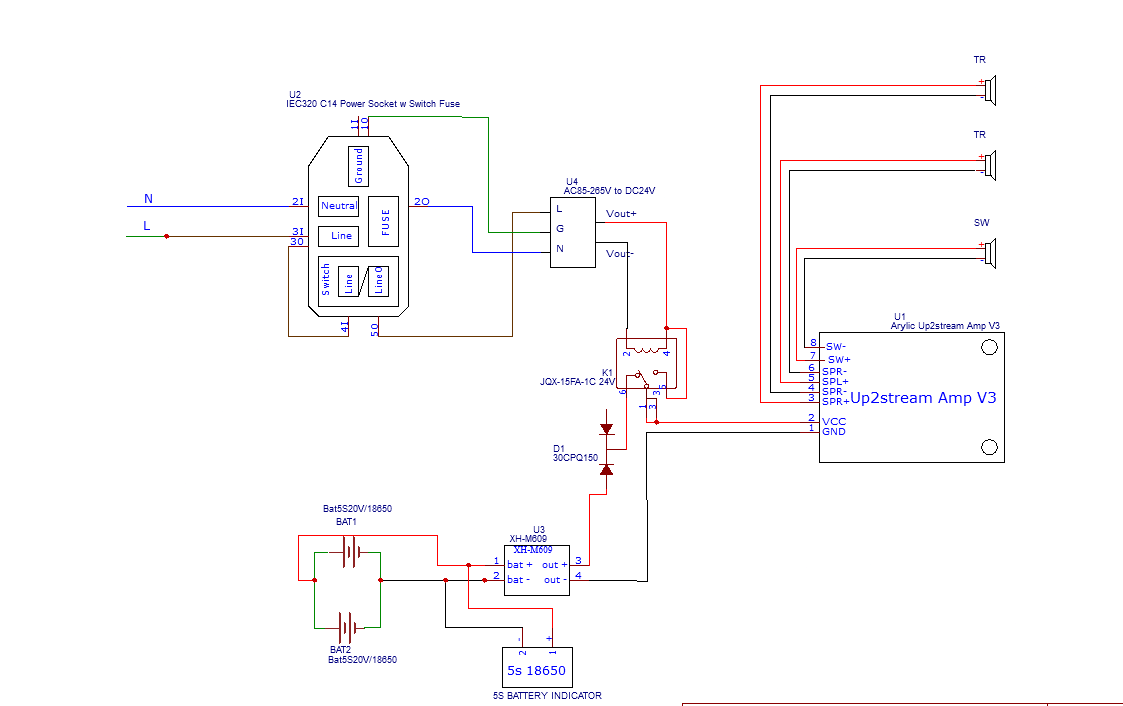
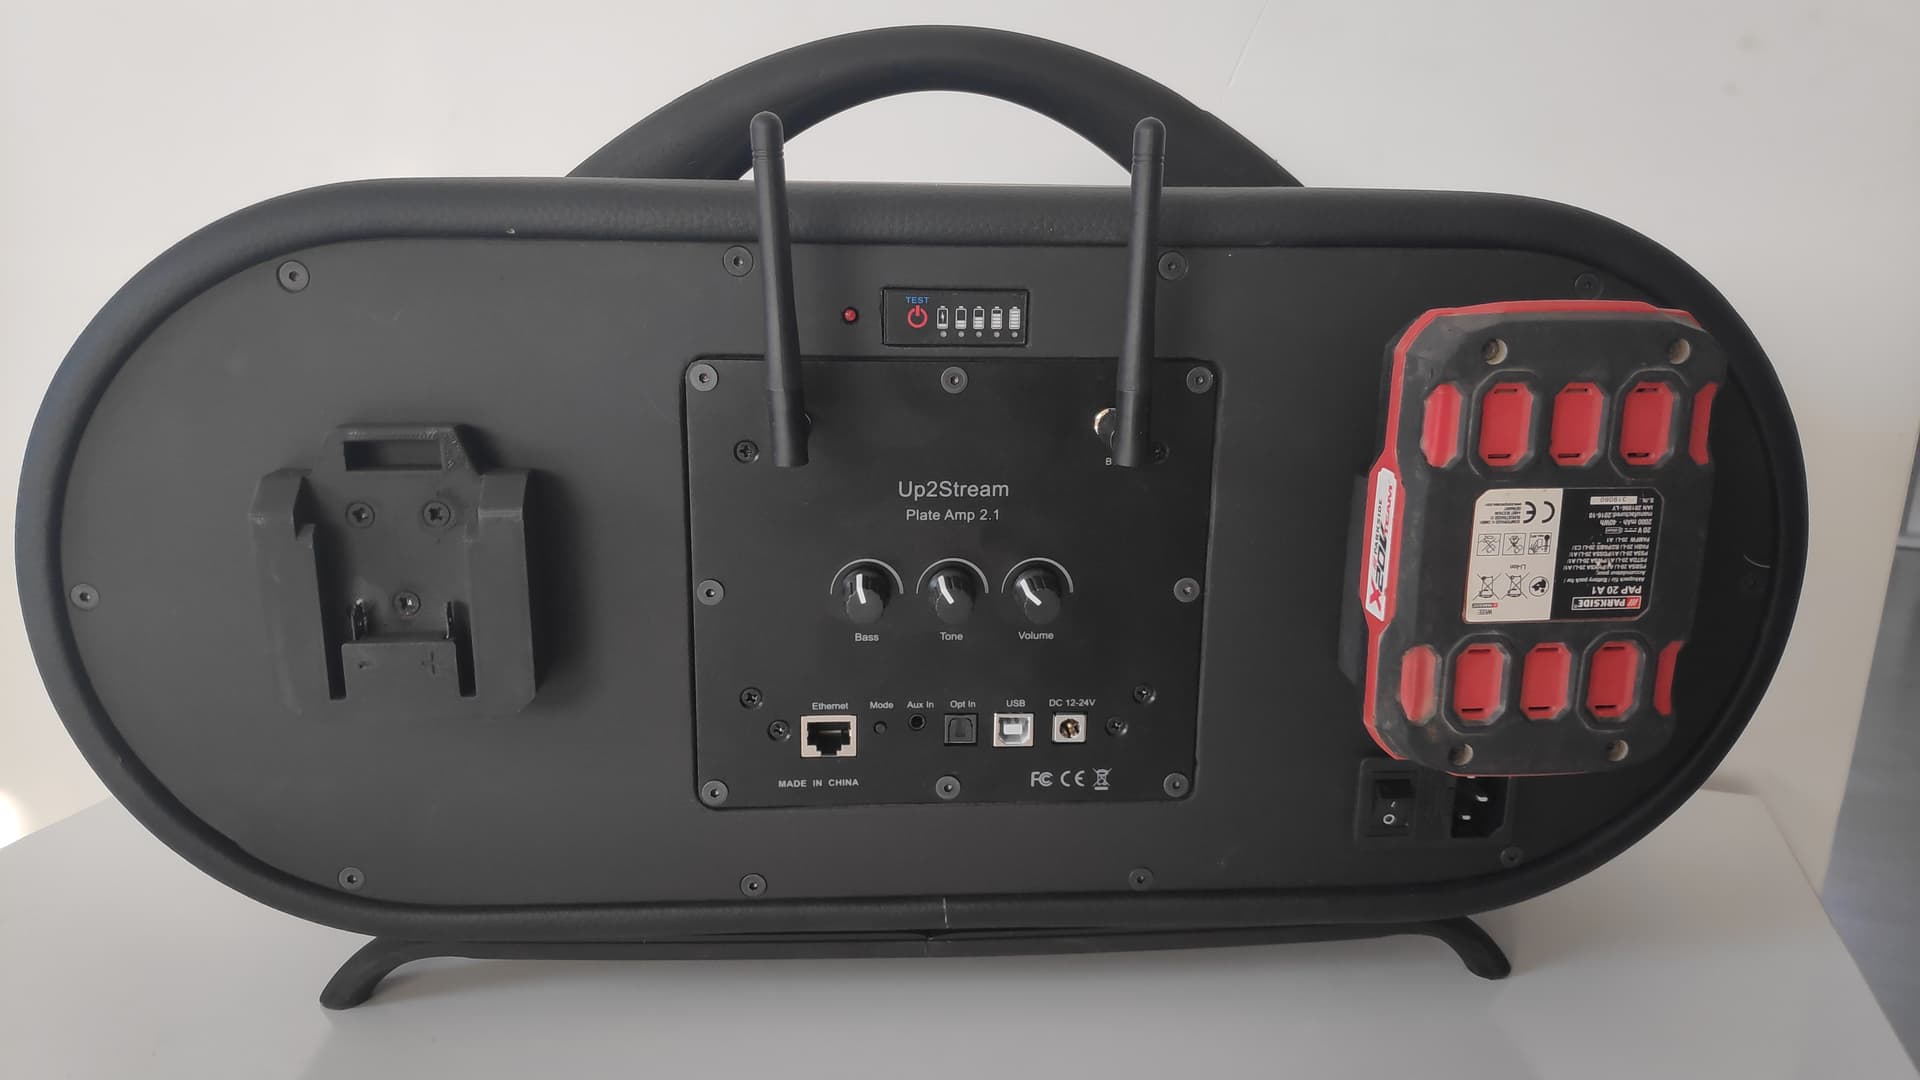
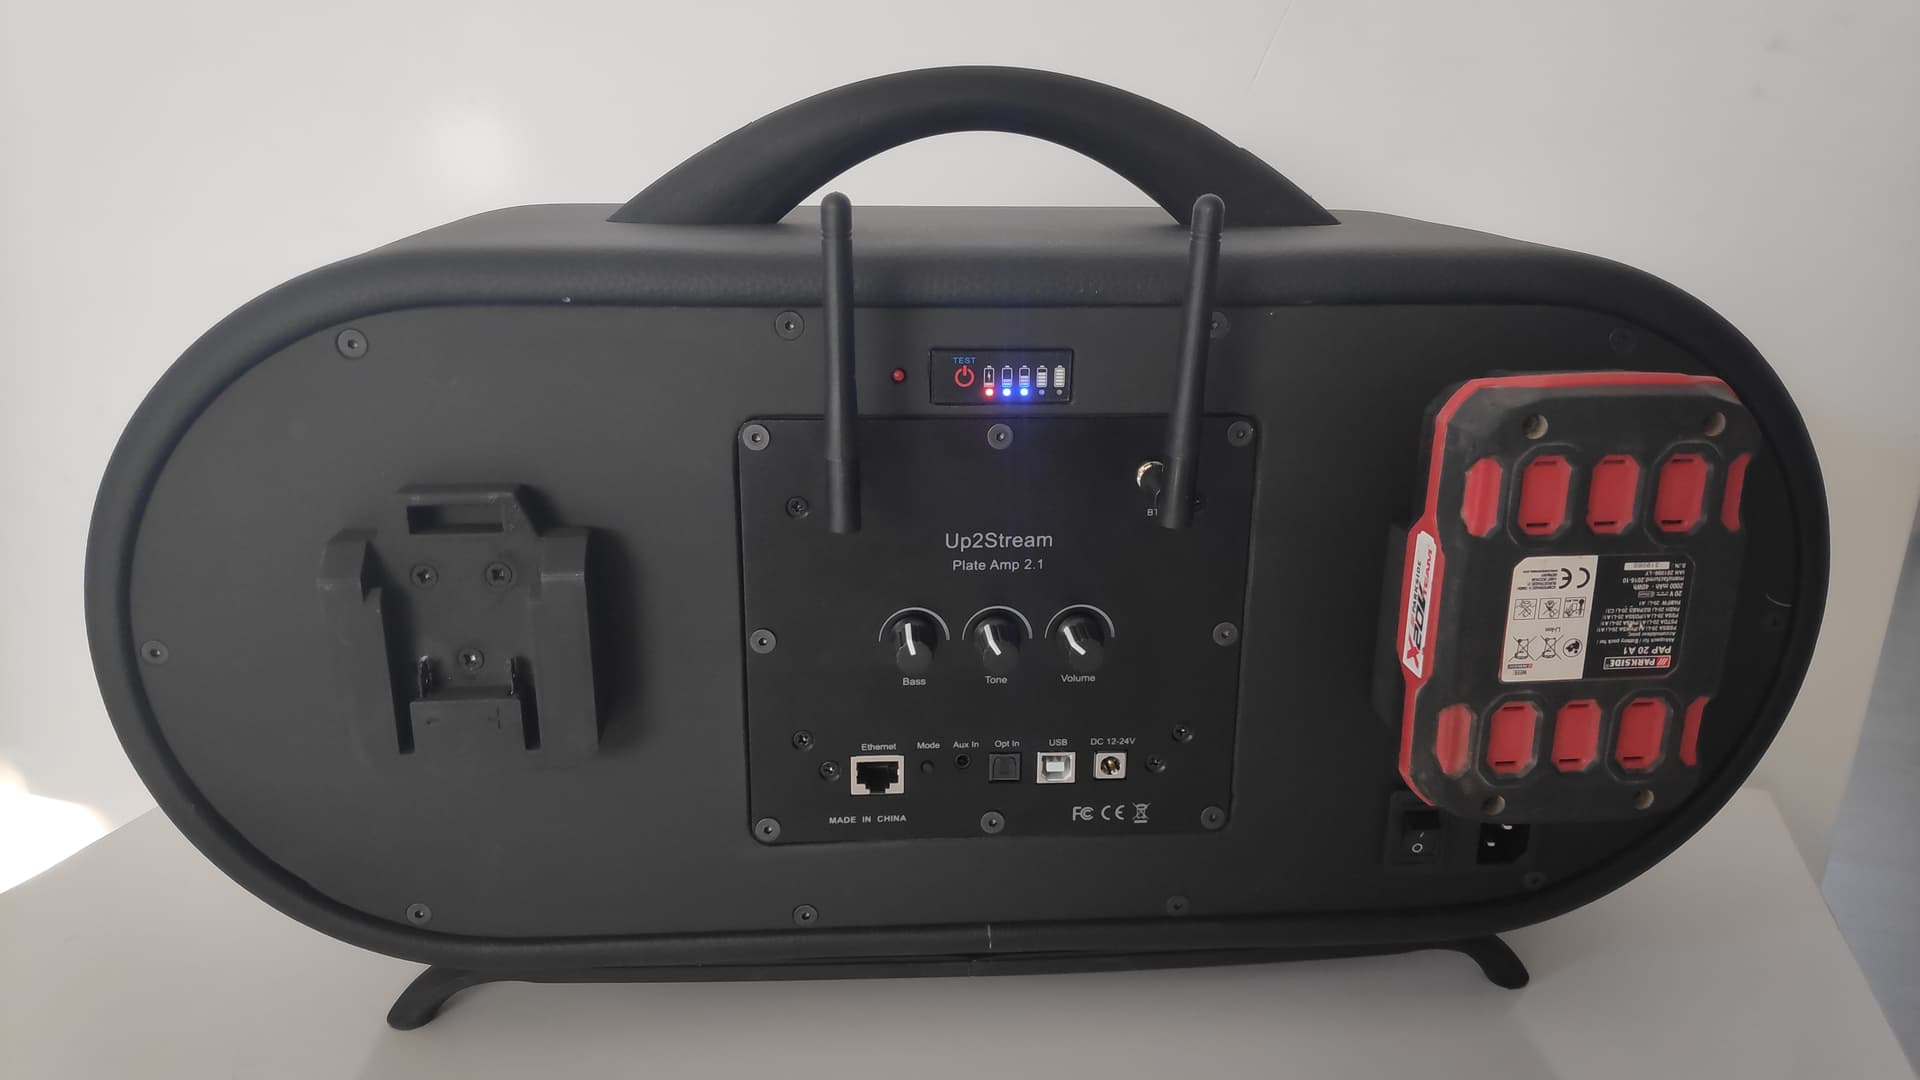
Wiring Diagram:
Switch automatically between AC when connected to a power outlet and, if disconnected and the battery is on, continues to play without interruption. Since I have lots of Parkside battery, it has been designed to work with them two parallelly connected. 2Ah battery last around 5 hours at moderate listening level.
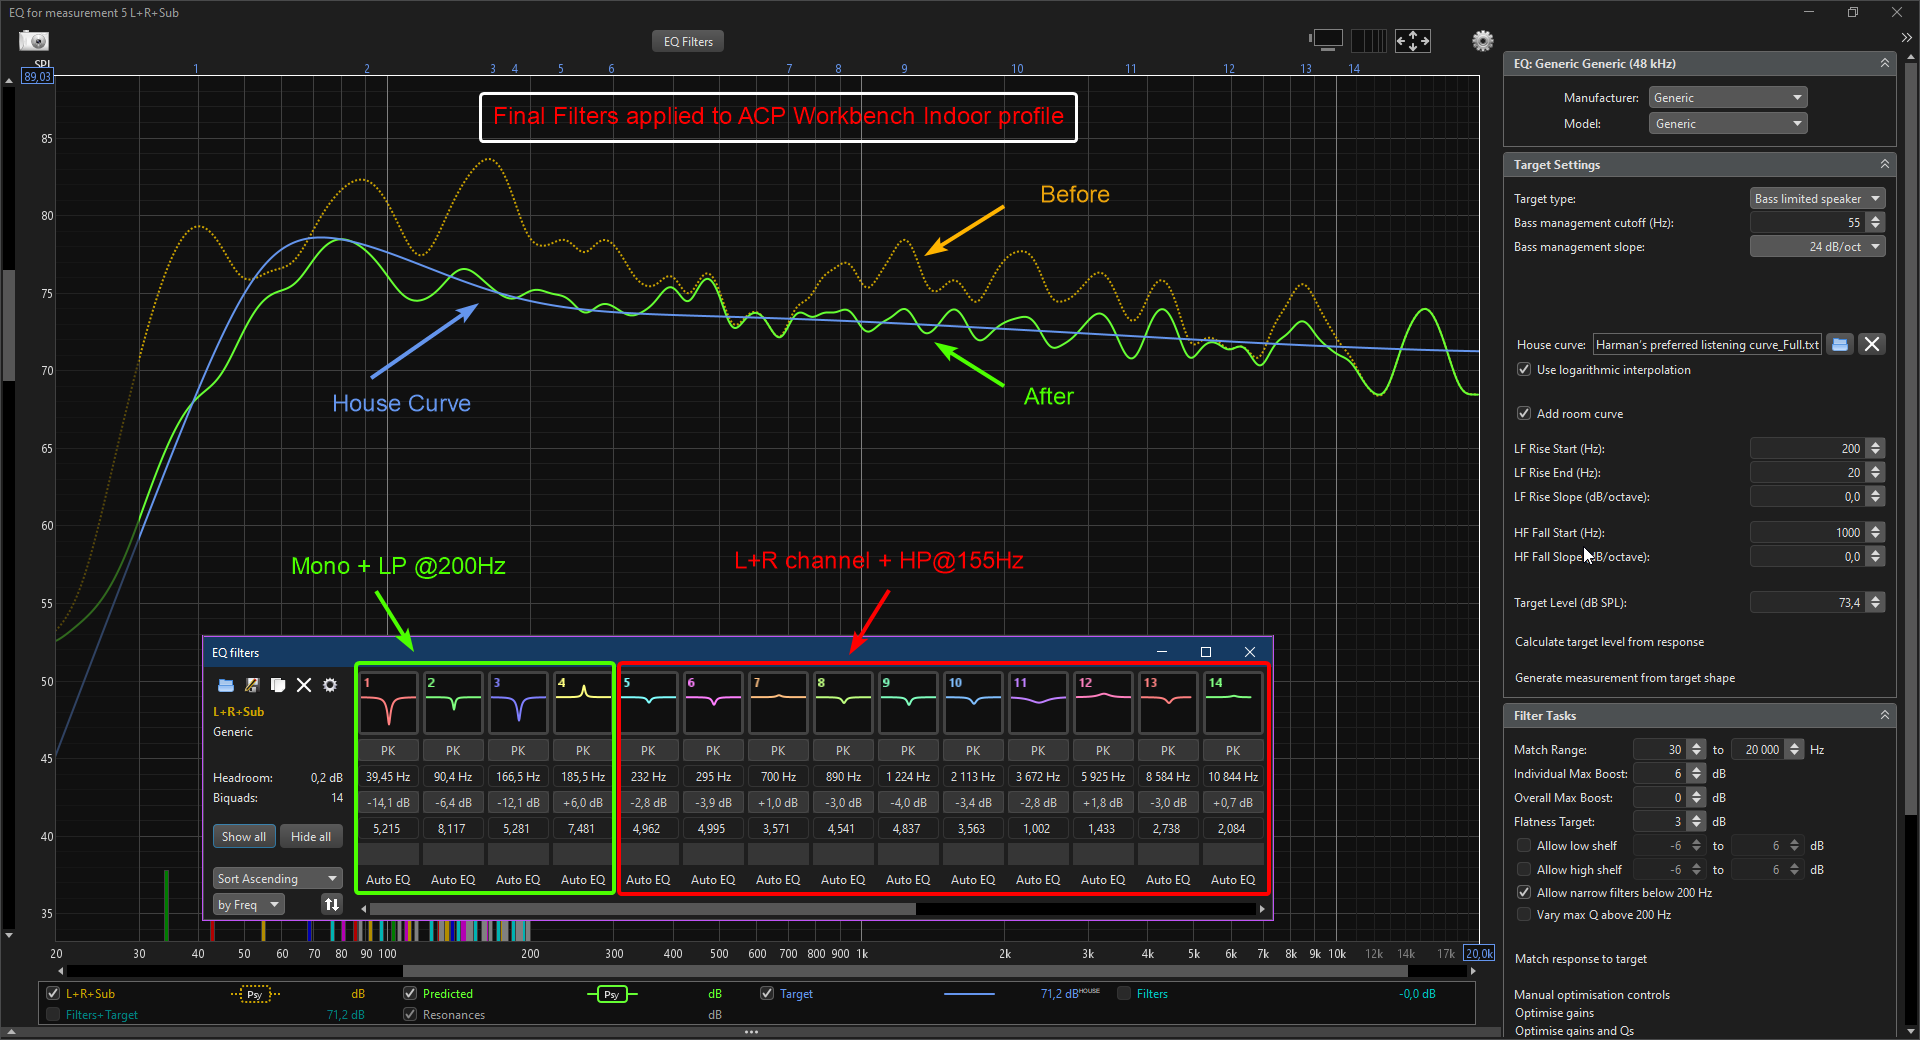
Filters applied to ACPWorkbench Tuning Tool, measured with Umic-1 and REW.
Final results:

Recommendation to Arylic:
- As it is, inputs jacks/connectors are not completely airtight and as the woofer is playing I can hear/feel the air comming out.
- Make it easier to connect power supply internally.