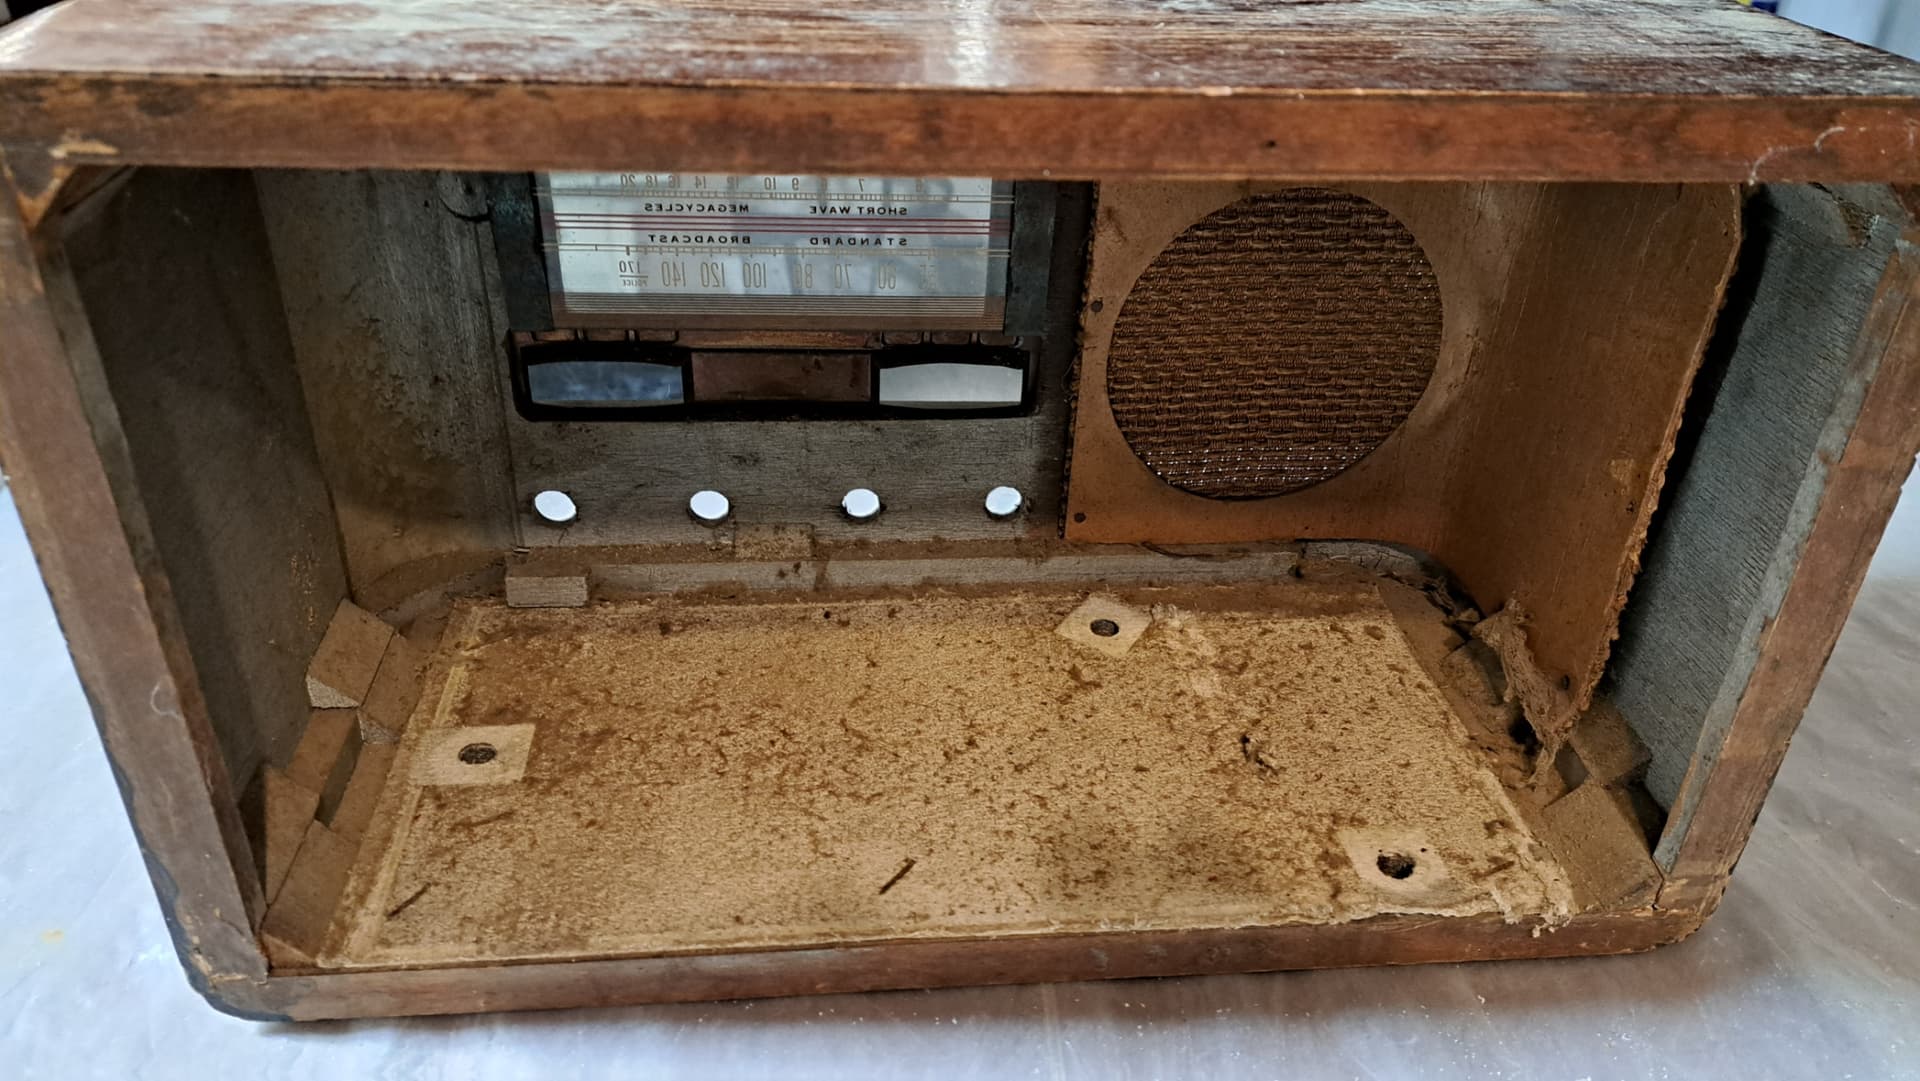
So I’m heading down the rabbit hole of replacing the tube driven tuner in a mono tabletop radio from the 30s. I’ve removed everything but now need advice on the new parts.
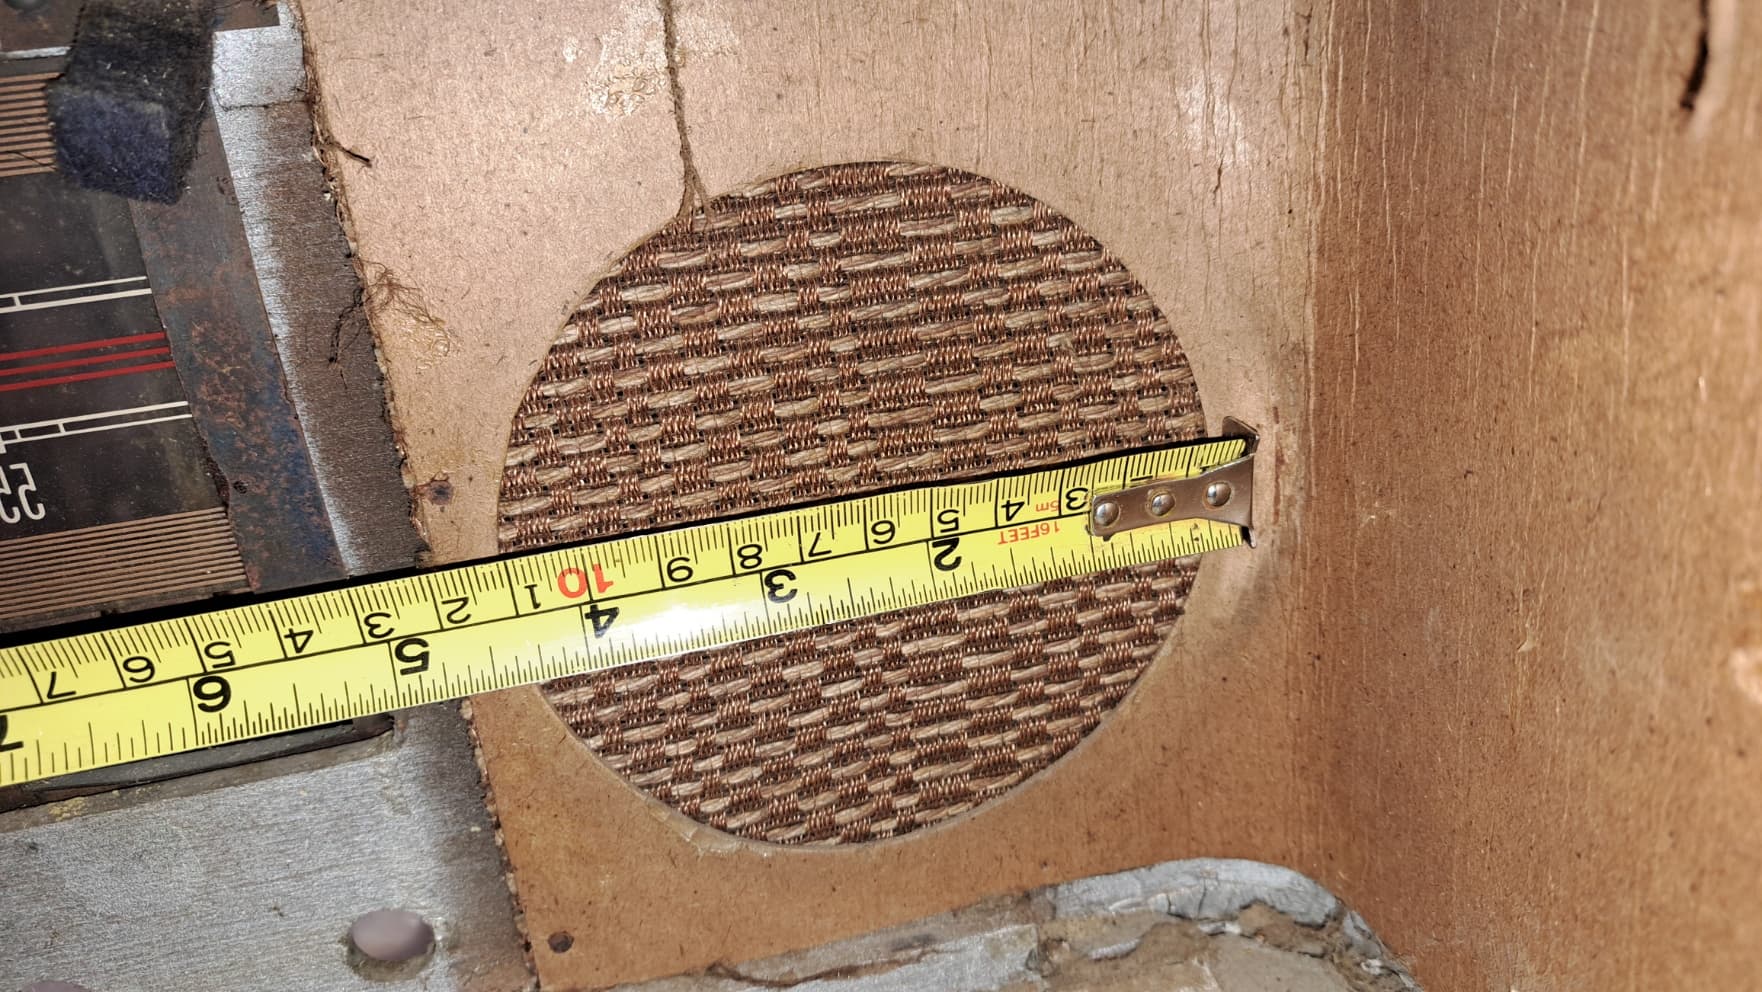
Do I get the Up2stream Mono amp? And what speaker would I need for the 4" space?
For any antique radio enthusiasts, I’m keeping the original electronics for re install if needed.
I’m also refinishing the wood but that will have to wait till spring when I can remove the asbestos.
As you can see, I have plenty of room. I will not be using the old electronics but will build a new base for the Up2Stream card and the speaker. It will mimic the original guts of the unit to provide a mount for the new speaker and the back of the tuning board. The tuning board will be just a black background with a red needle fixed in place as there won’t be any mechanical options. All selections will be made via the phone app or extending the IR eye to the front and using a remote
It really doesn’t matter to me if you are working on a 1930’s radio or whatever….
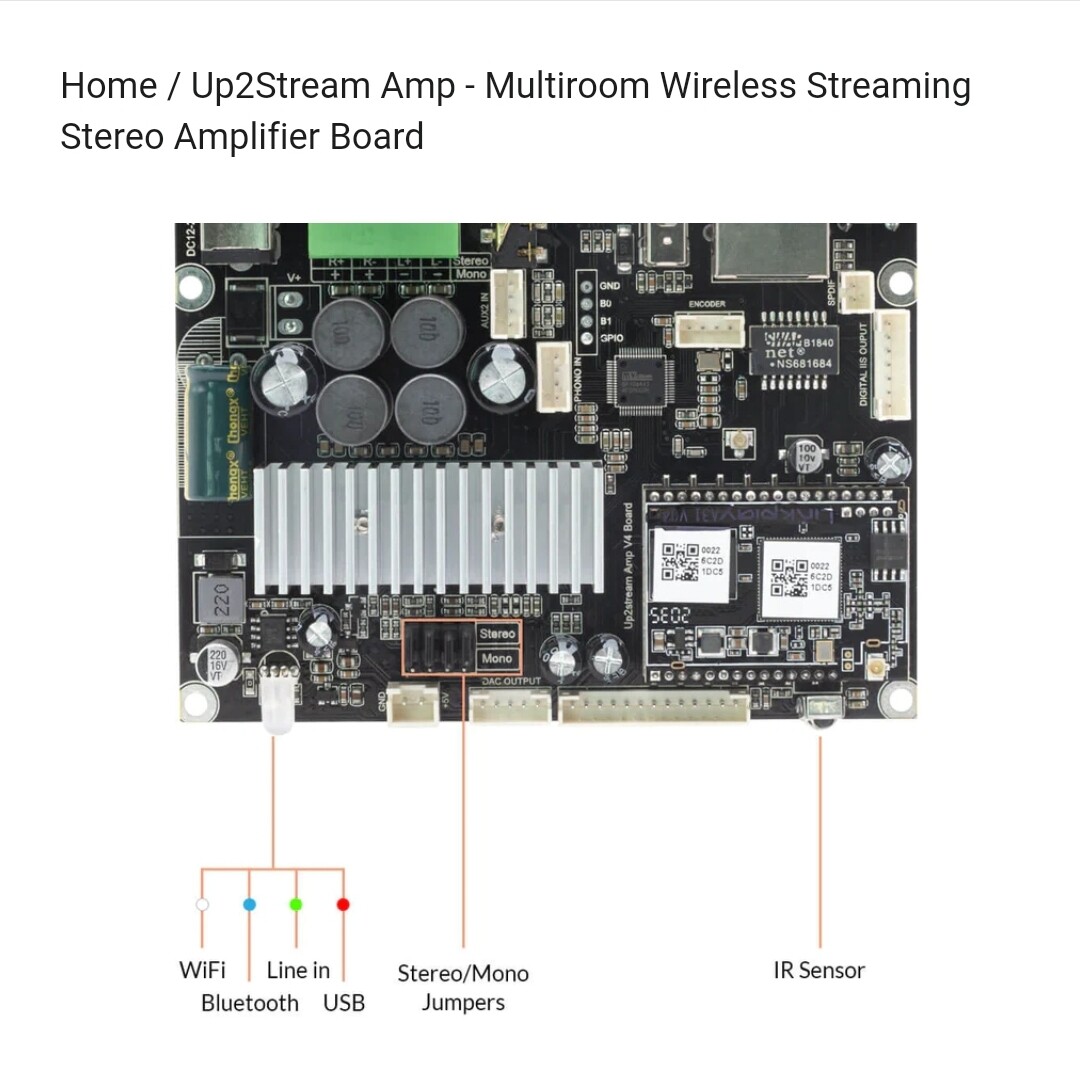
I think the difference between the two Arylic devices is that both are stereo, but one is bridgeable to mono by changing a plug on the board. Bridged mono obviously give you more power, although I’m thinking that’s not what you are about.
The cabinet obviously needs some tender loving care to bring it back to its former glory - that’s a nice little project in itself.
I would mount another timber panel behind the speaker position so you’re not screwing into the old timber (maybe glue fix) as far as 4” drivers, there are a plethora of suitable full range drivers on Parts Express in the US.
With the original tuning dial, I would get hold of some opal acrylic sheet to use as a diffuser and cut it to fit behind the dial, them mount some LEDs behind to give illumination when it’s turned on.
The extension remote could probably fit into one of your existing knob holes, maybe look for ‘wood plug’ or ‘button plug’ on eBay to fill the other holes.
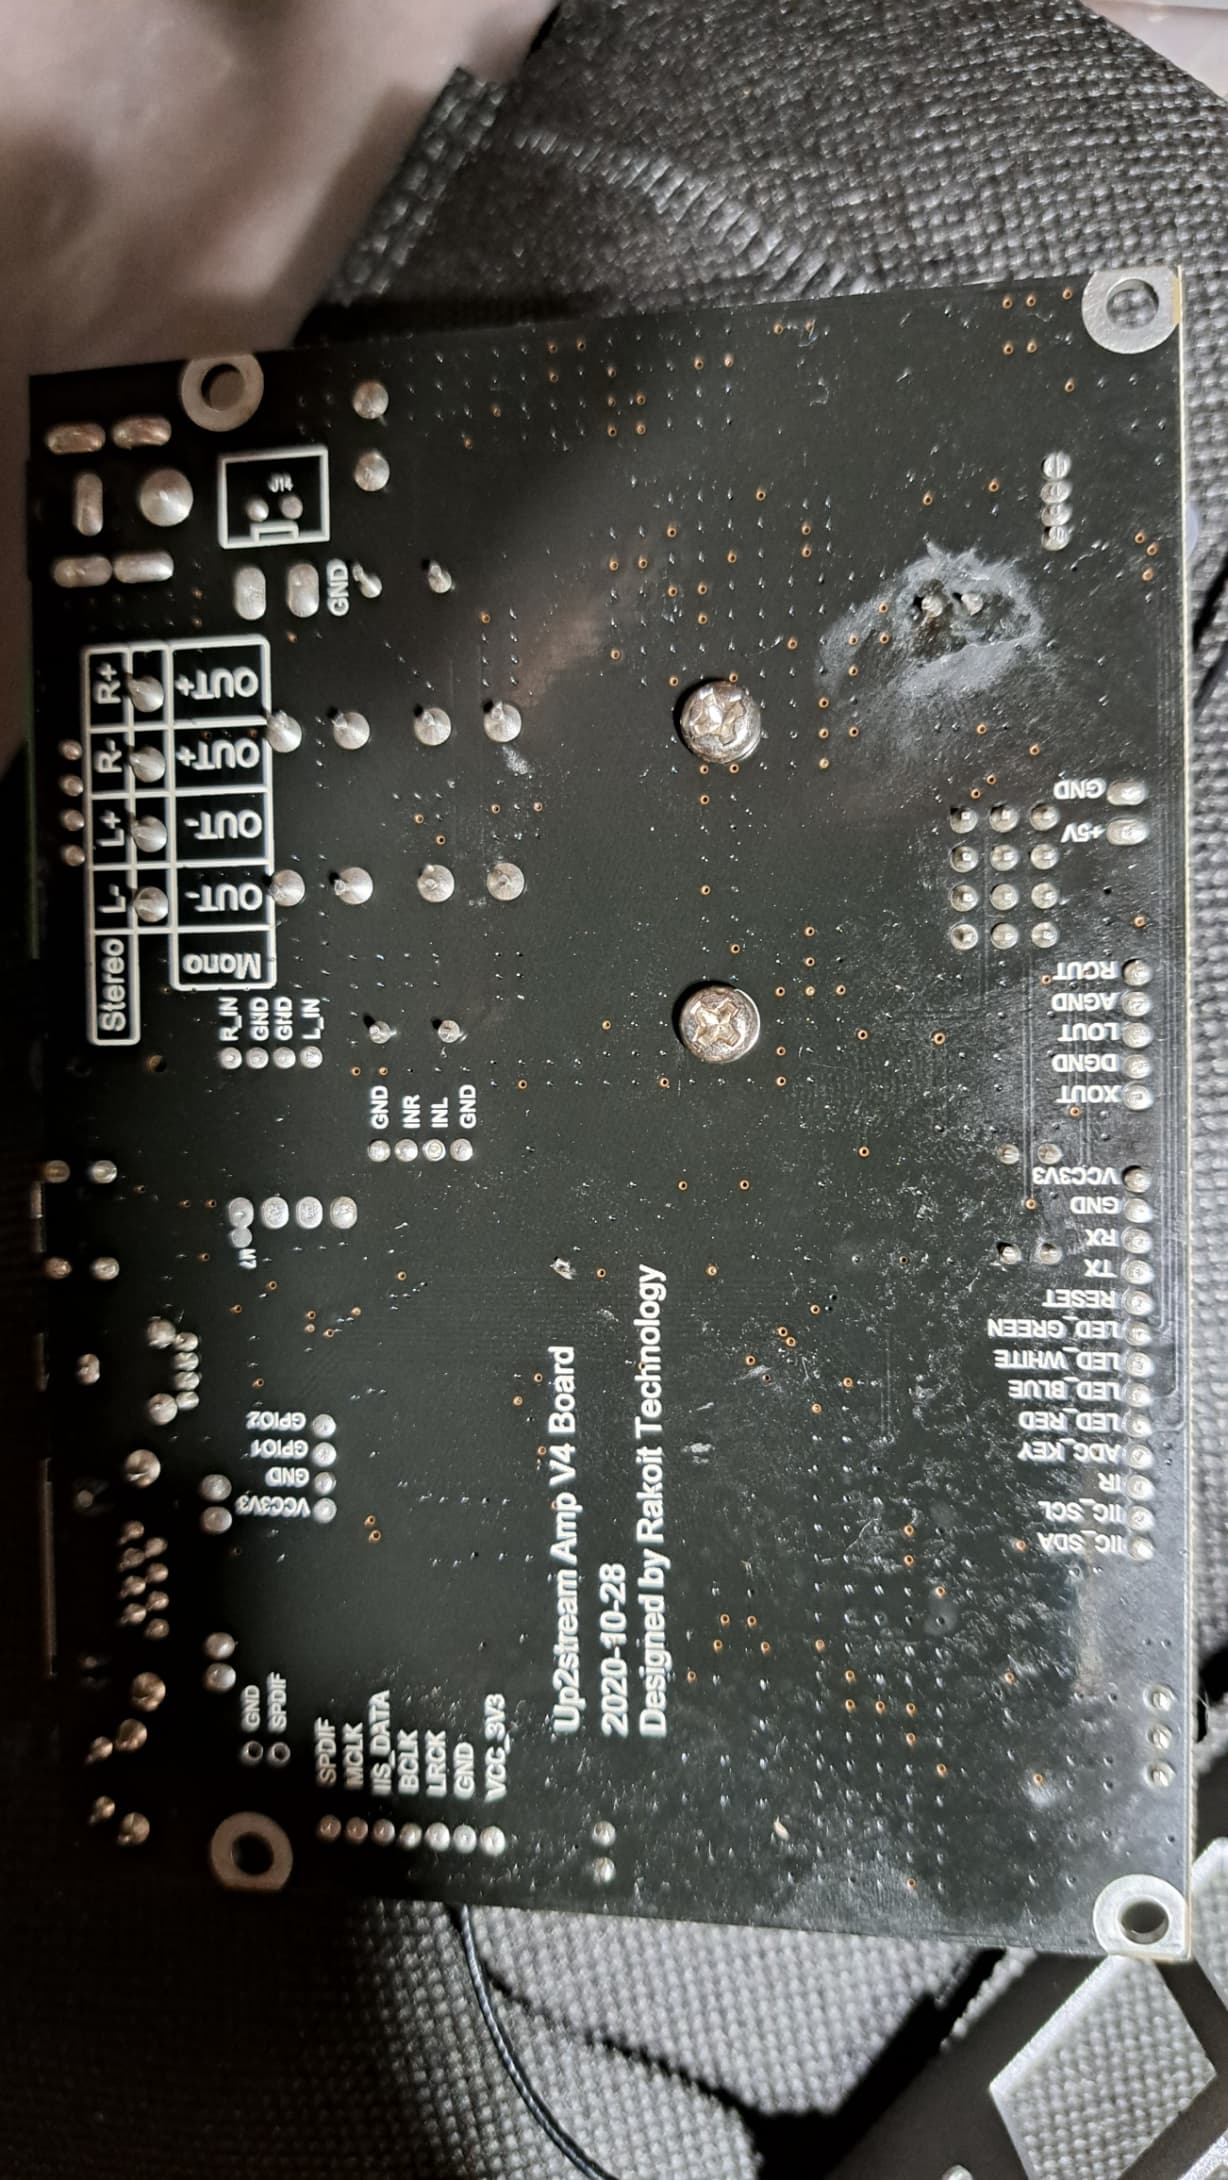
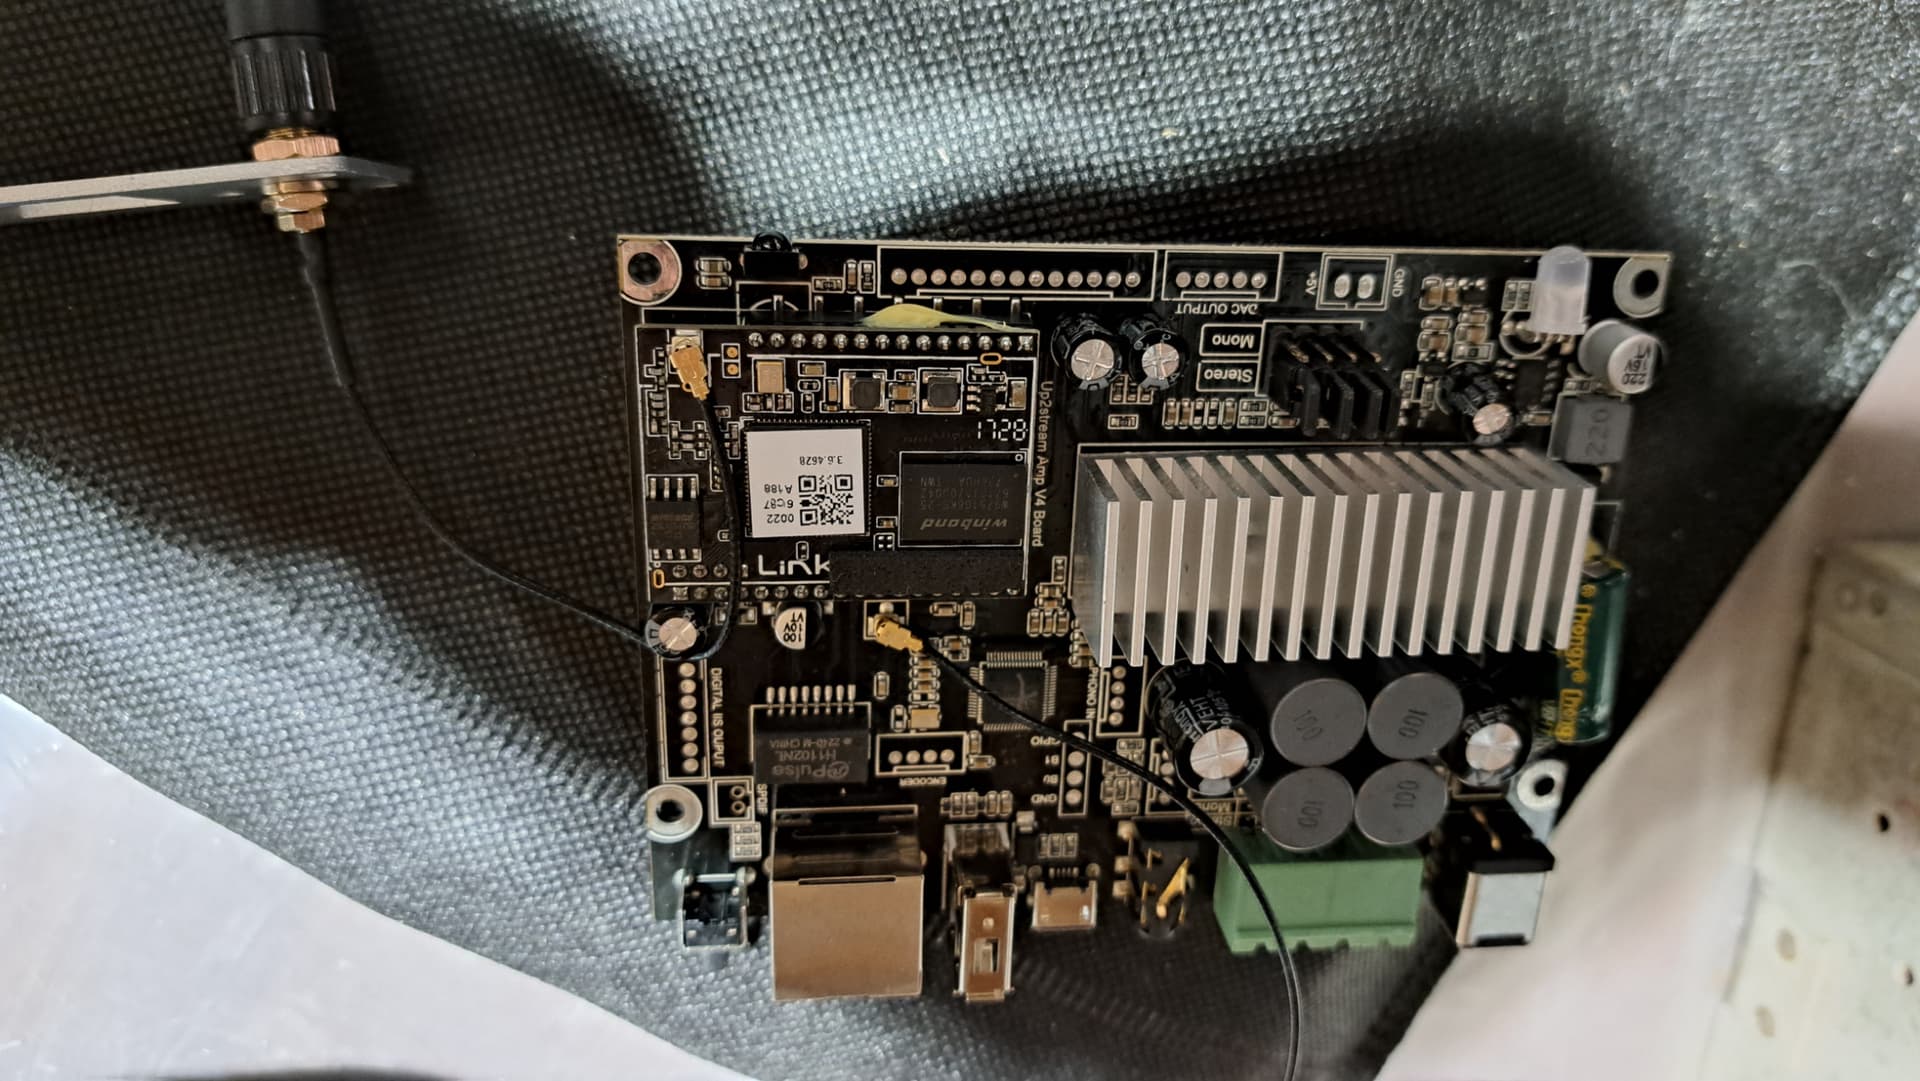
Since I already own an A30+ I decided to take it apart and see what’s inside. It is the Up2Stream Amp V4 Board and it has the jumpers to make it Mono. It’s priced at $139 US so $40 more than the bare bones board. What you will get over the DIY board is a power supply, a nice case and remote. I may just order this unit again since sourcing the other items over DIY would be close to this price anyways.
Ok so now that I’m comparing the two boards you do loose some flexibility on the completed unit. If you look closely there’s no connectors on the DAC output, Digital output and a 5v connector. I don’t plan on using these anyways so it doesn’t really change my plan
As I do with most of my projects I’ve changed my mind once again. I’ve ordered the Mono board and power supply directly from Arylic. (Actually I was looking for the currency exchange rate on PayPal and inadvertently hit the commit to purchase button).
My biggest challenge is to stuff a 5.5" inch ceiling speaker into the small space. It’s a Single Polk Audio RC60i. The advantage of these speakers is they are similar to car speakers in that they are compact (tweeter is in the center of the cone and the crossover is mounted directly behind the mid-woofer).
This will put my limited woodworking skills to the test.
I will assemble the radio as a remote access only unit for now with the prospect of repurposing the original buttons to use momentary switches for pause, FF ect.
Hint for the backlight in the bezel, use amber leds and reduce the voltage (brightness) to give the old filiment lamp glow, to get an even spread of light you can experiment with 4-5mm plexiglass and insert the leds around the edge to “glow” more evenly. Another hint is to use sandpaper to rough up leds to diffuse the light more. Play around with positions, voltages and colours to get that vintage feel. I actually stayed with “wheat grain” bulbs and cranked the voltage right down, makes them last much longer and looks really vintage cool! You can also try to mount the IR behind the bezel, may reduce the range but should work OK
A tip if you are dimming a LED (or LEDs) by changing the resistance, an easy way is to put a linear pot in series (2k has worked for me).
Once you get the desired brightness, measure the pot resistance at the desired setting and replace with a resistor of that value.
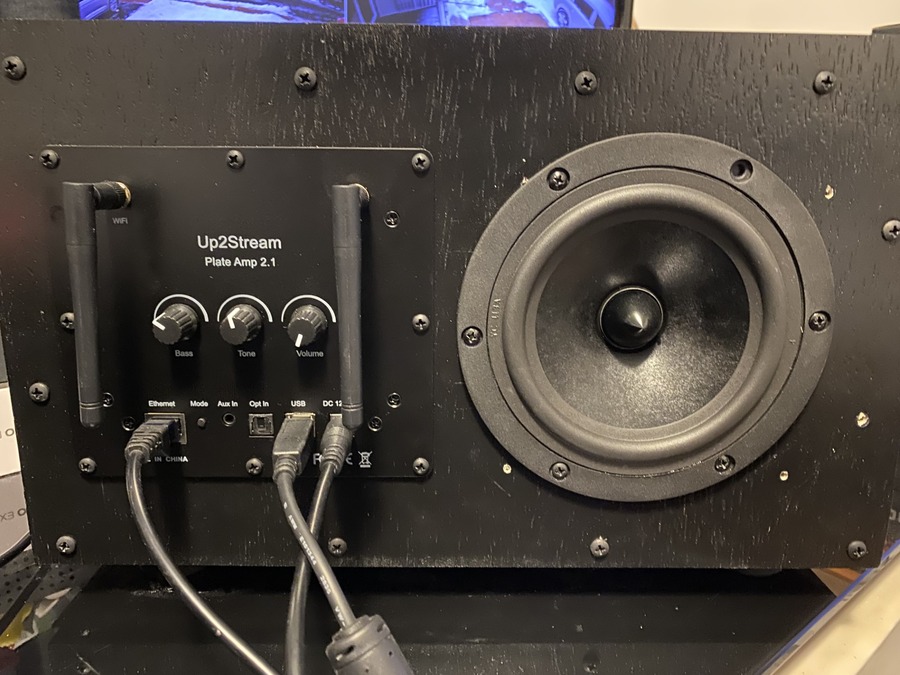
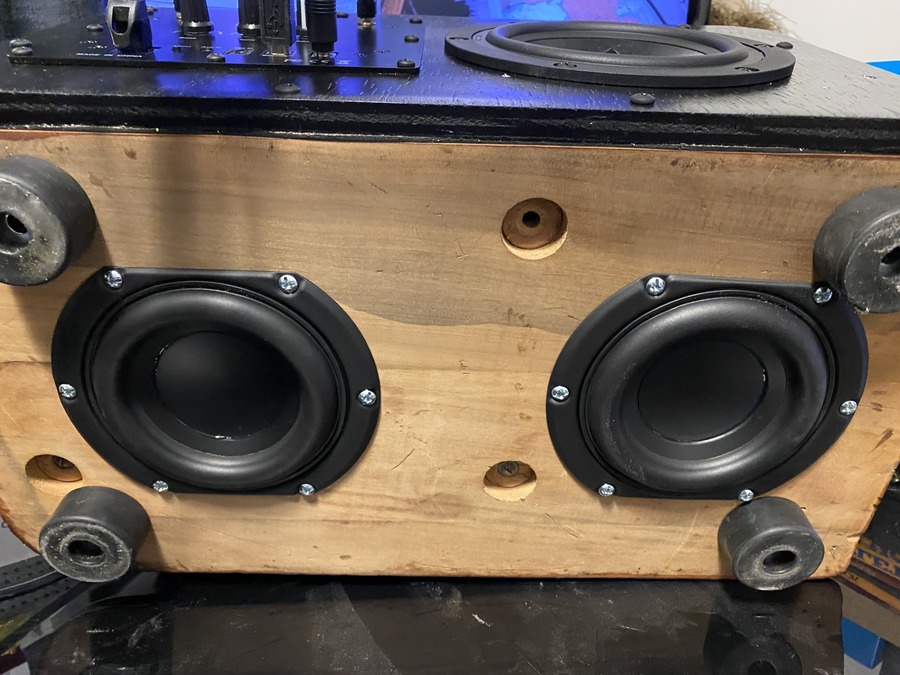
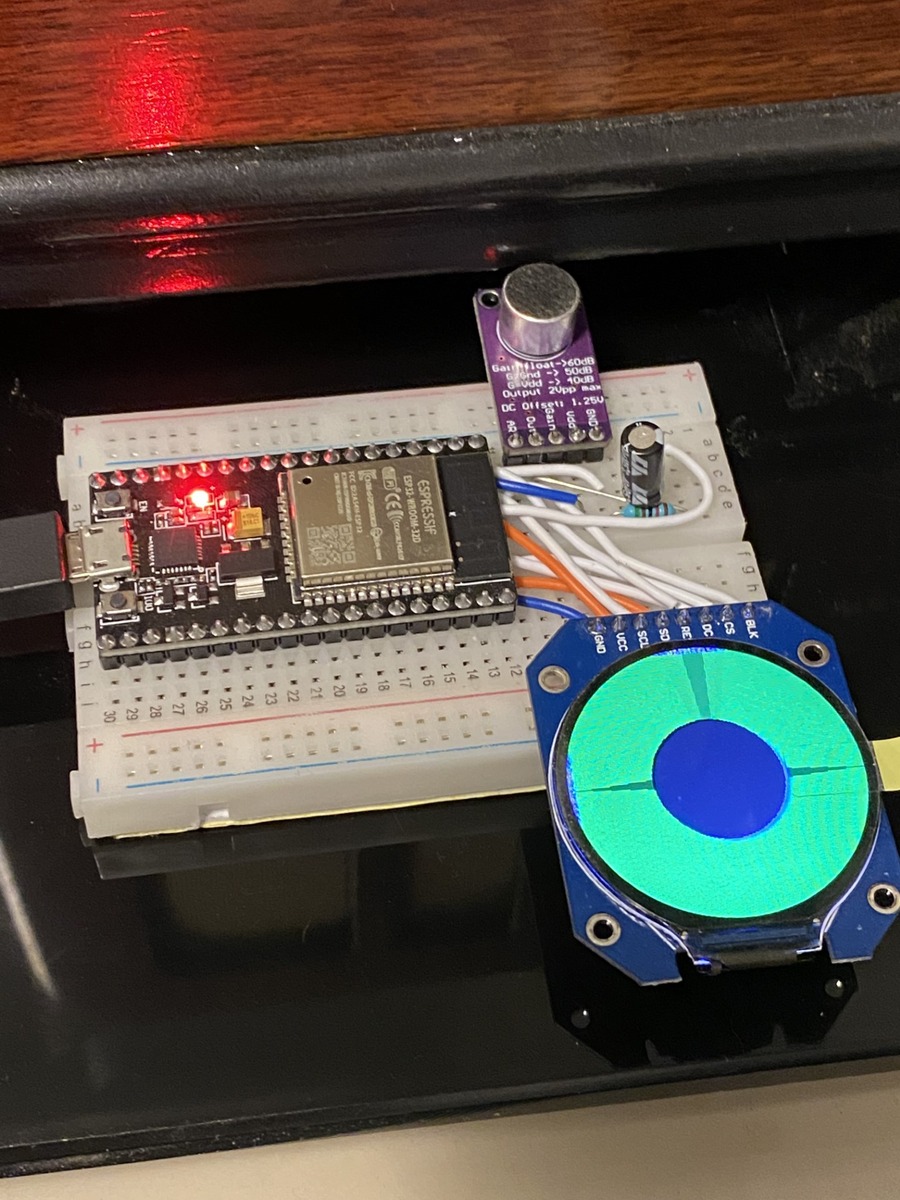
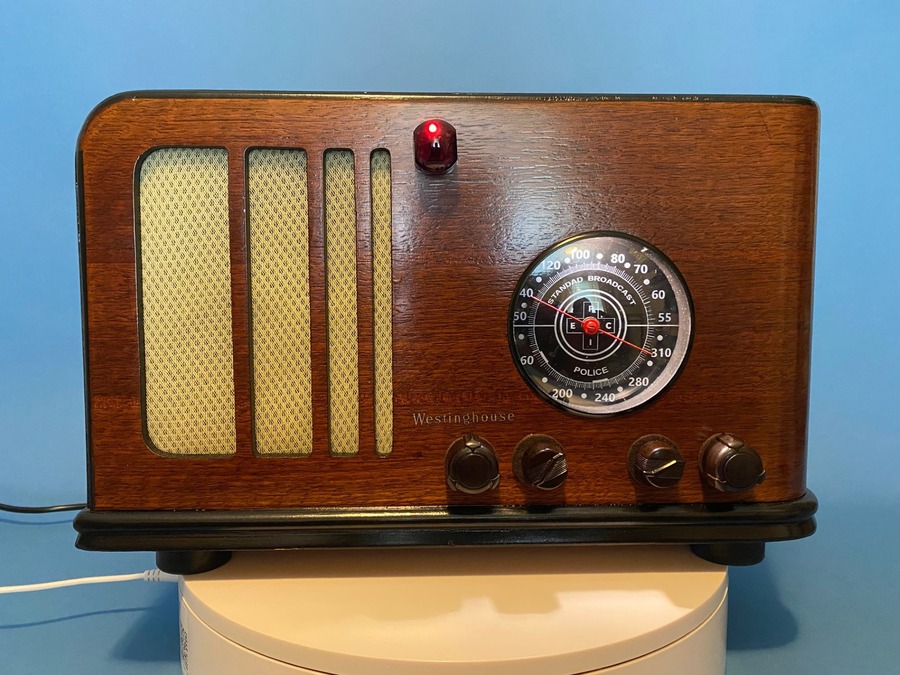
I used the wireless plate amp 2.1 in a Westinghouse. I replaced the original 5" speaker with (2) 2 1/2" full-range speakers in the front, a 6" subwoofer in the rear, and (2) 3" passive radiators on the bottom. Modern speakers are designed for an enclosed space. My current project is an EMUD T7. This will use the same plate amp, 6 speakers and a Magic Eye simulator run on Arduino.