The forum may be interested in another project by Baynes Audio, this time for a customer who wanted his daughter’s 1980s vintage Technics SU-V5 amplifier repairing. When I demonstrated to him a Luxman R1030 where I’d already incorporated an Acrylic Up2Stream Mini V3 streamer, he wanted the same ![]()
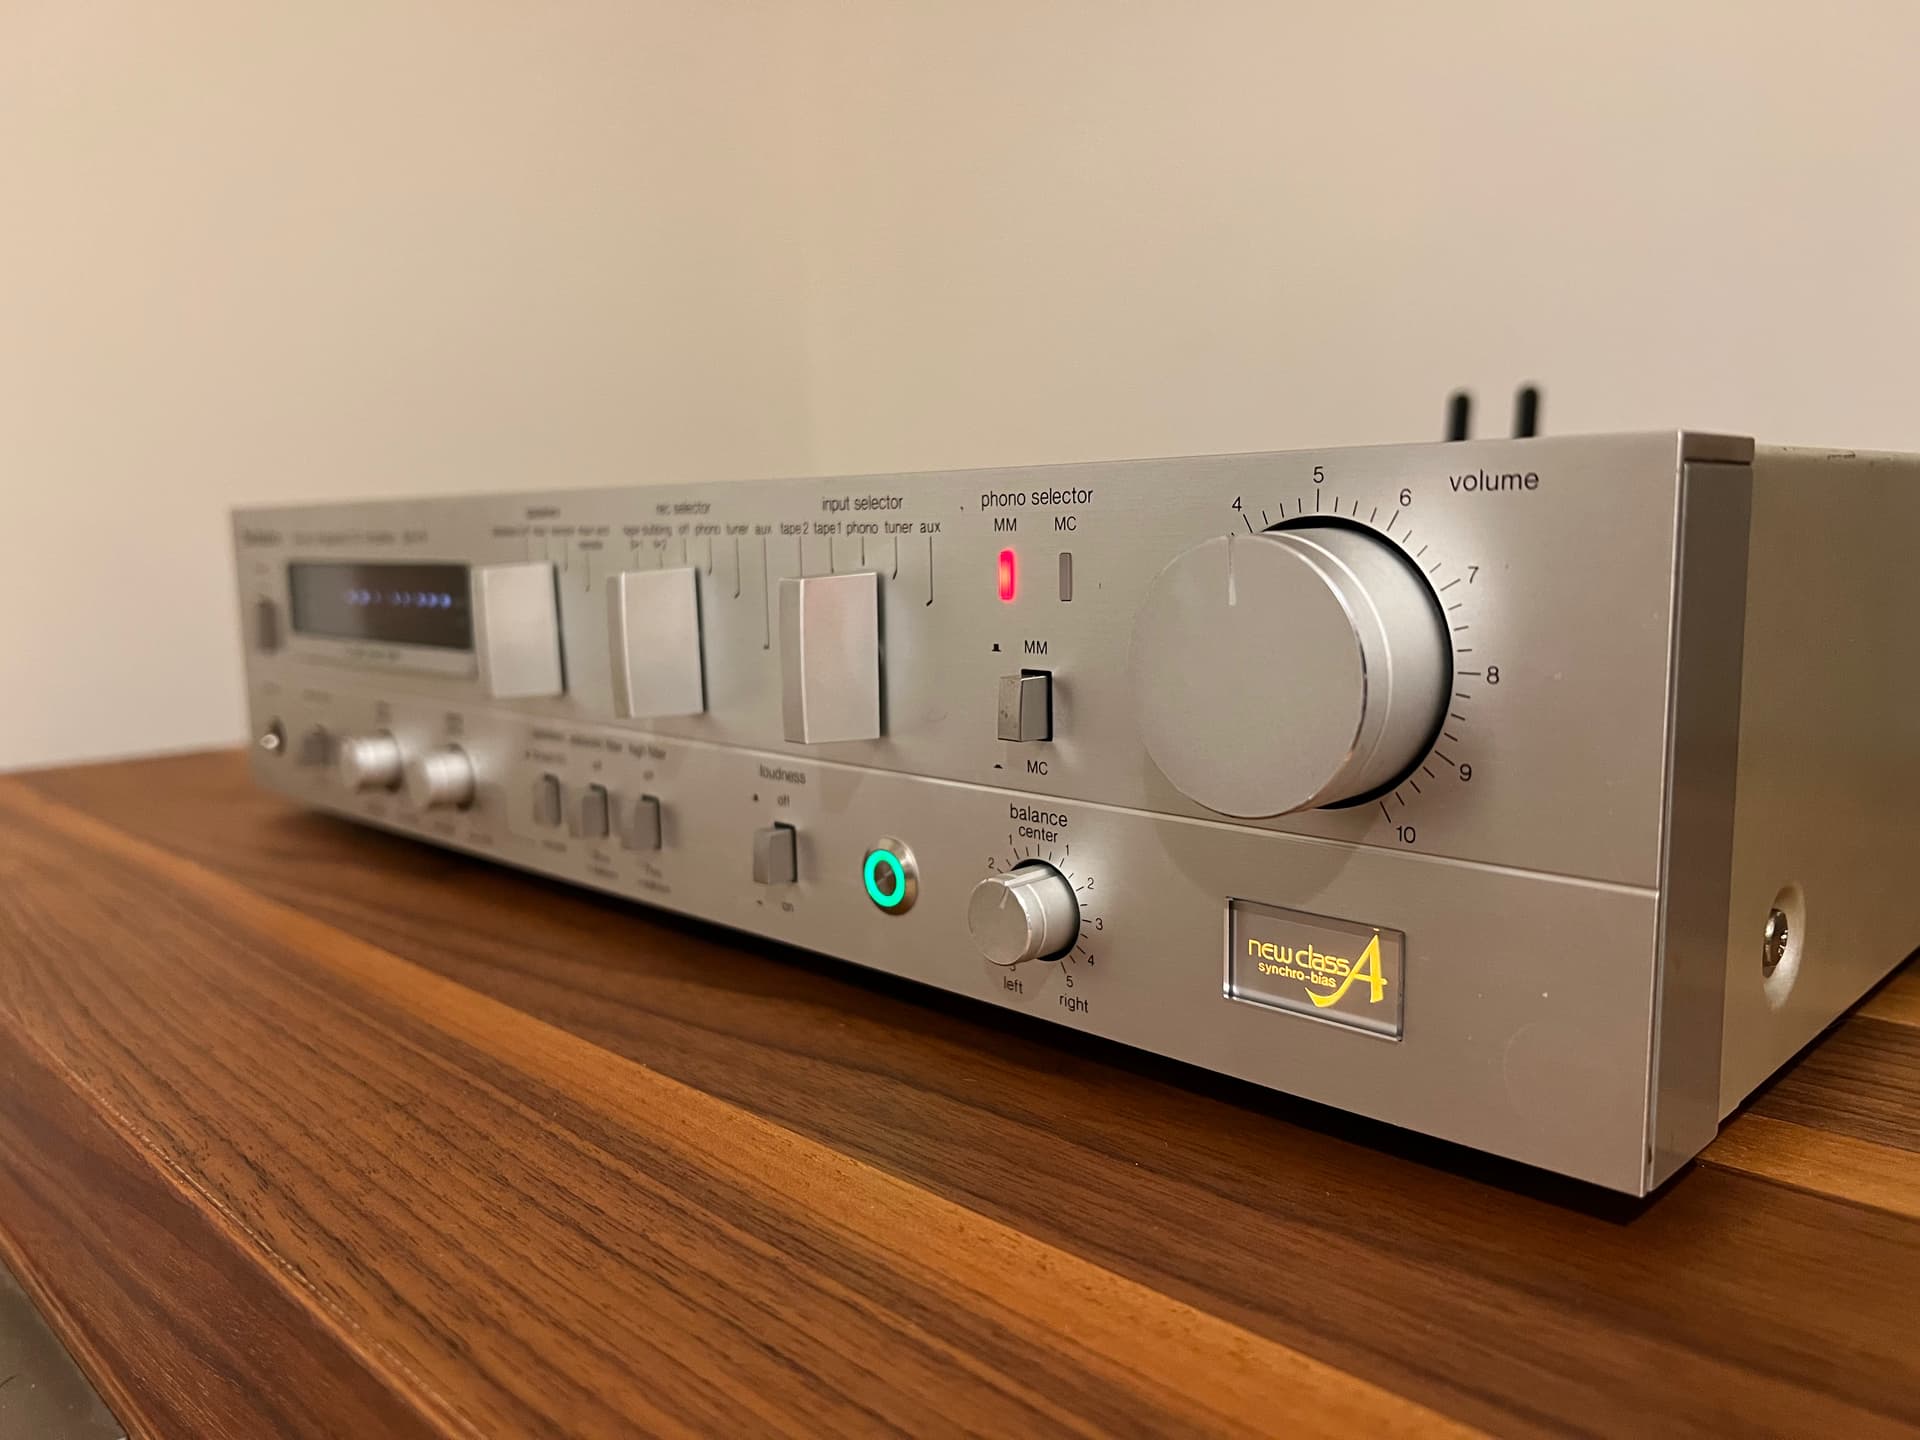
This is how it looked in it’s finished state - cosmetically almost as good as new, and functionally far better than new:
The amplifier was repaired, cleaned it inside and out, re-capped, and it had a full service before being modified to include an Arylic streamer.
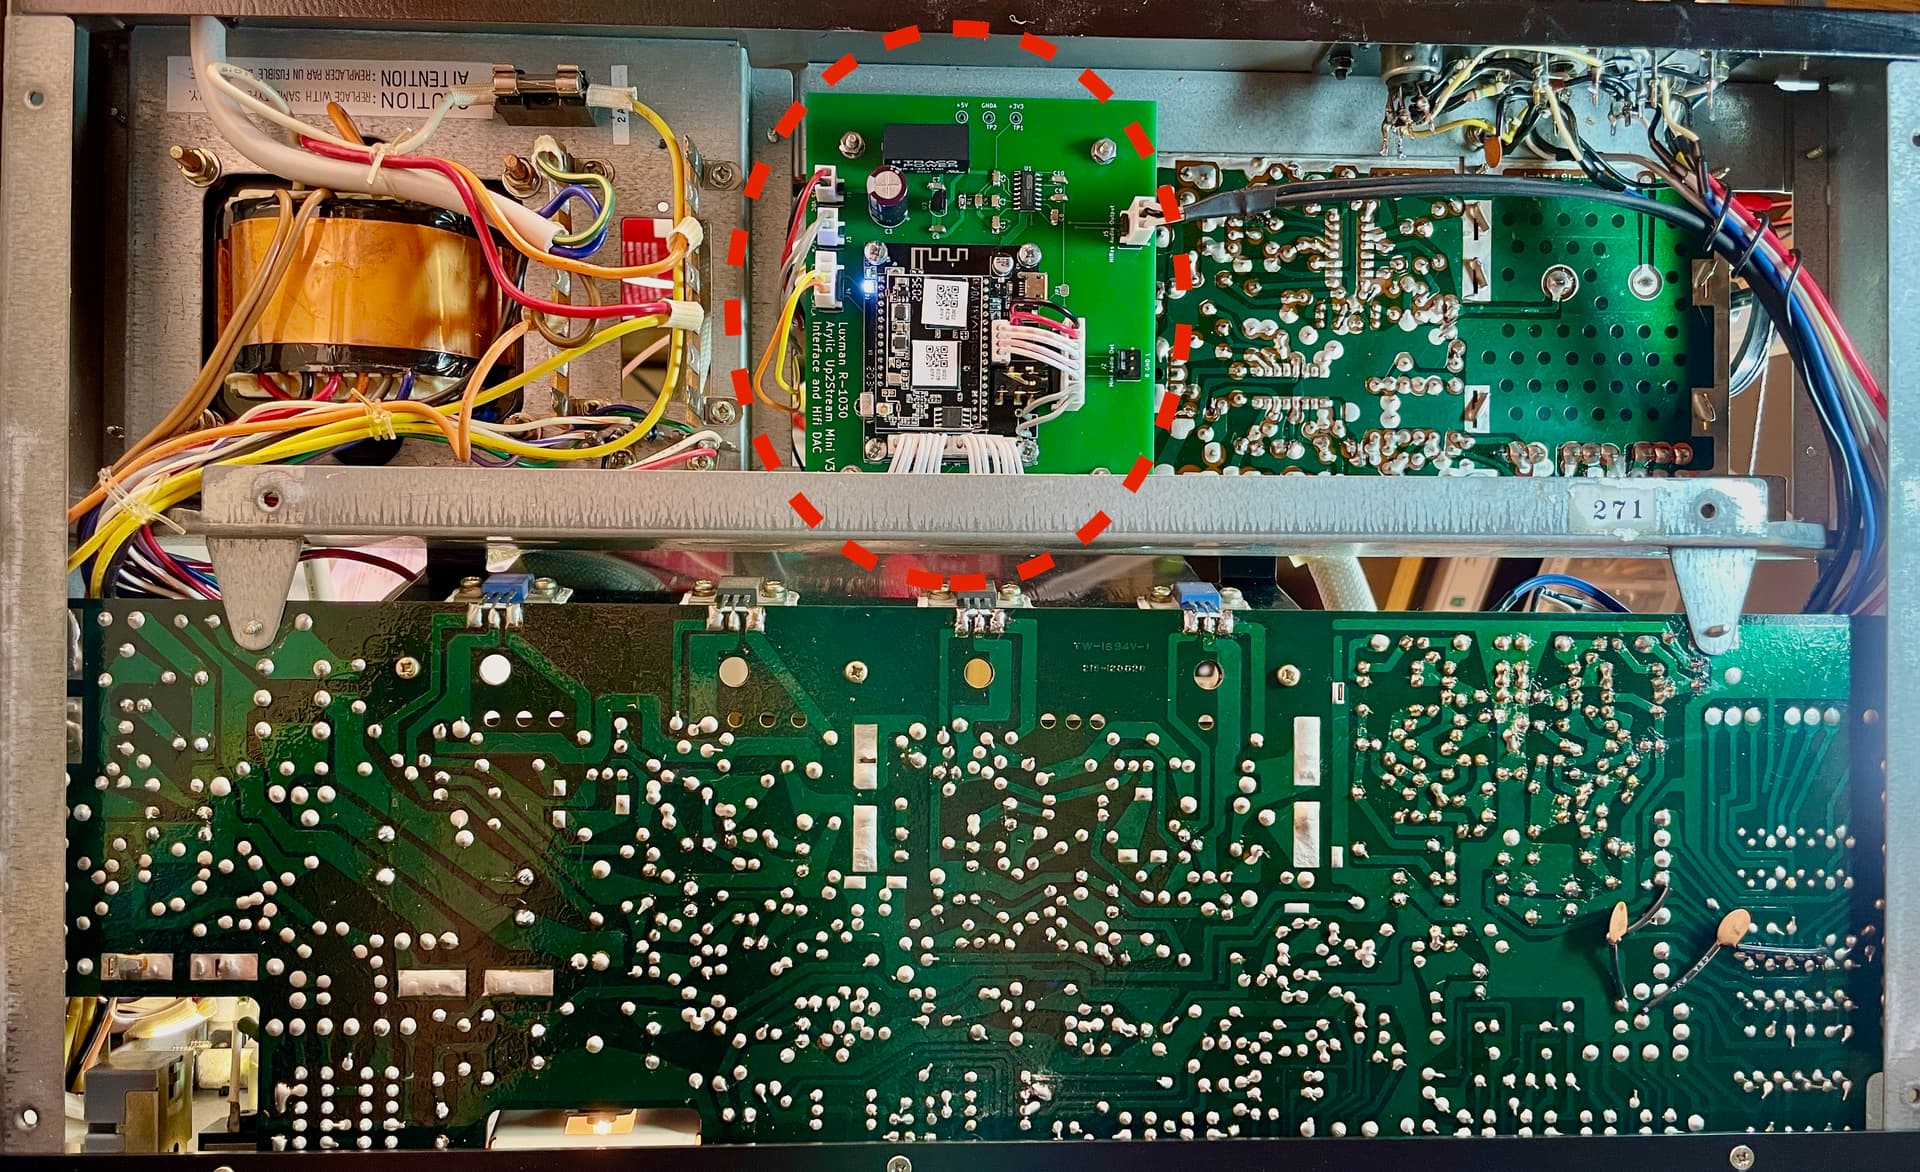
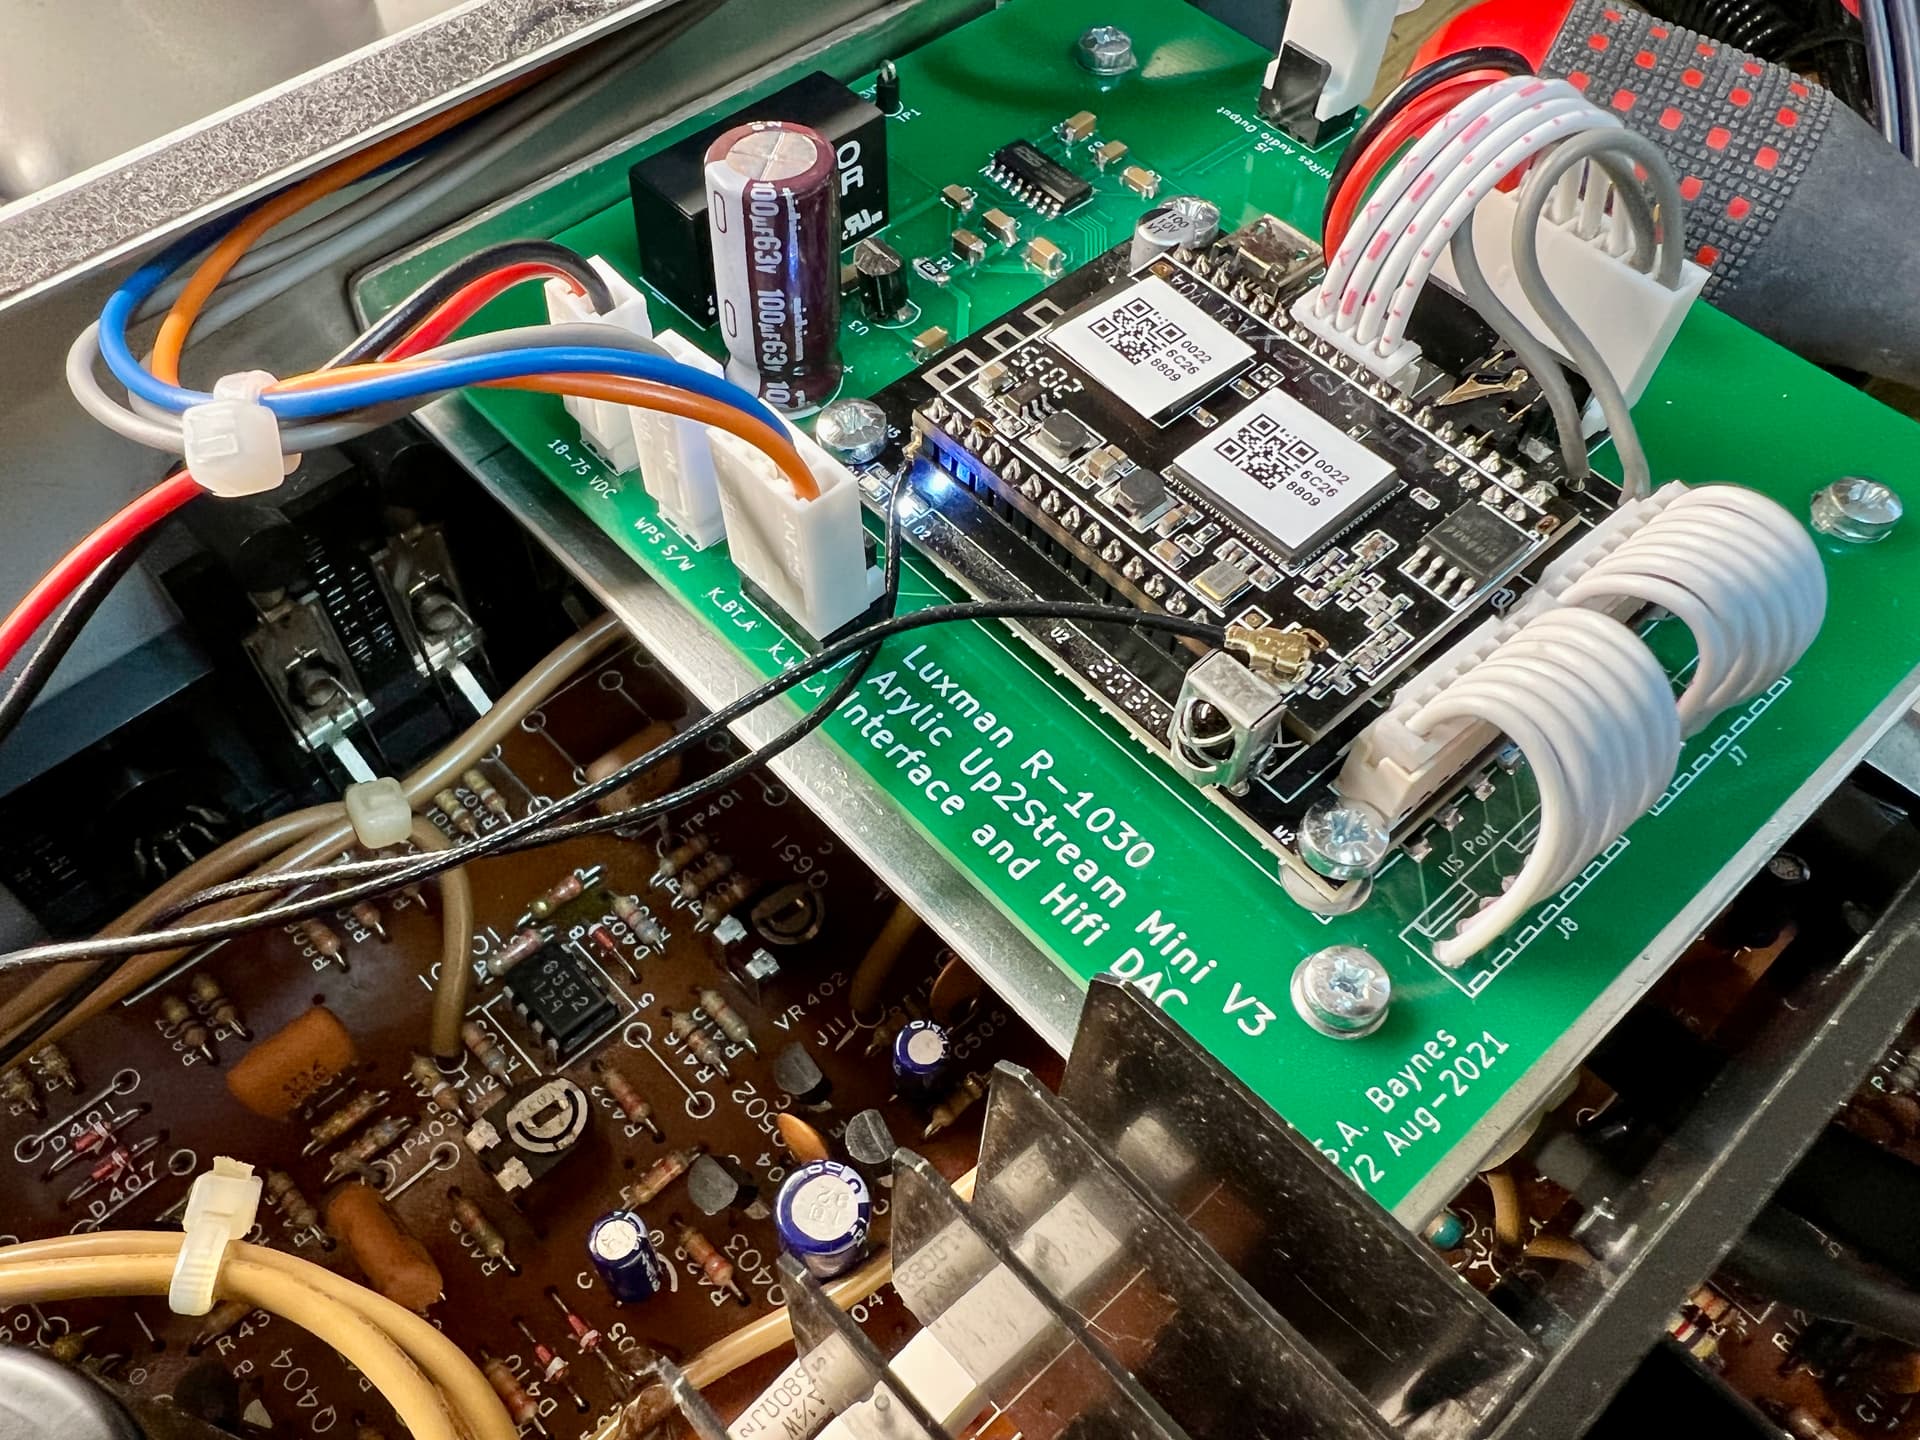
For the Luxman mentioned above, I’d already designed a PCB for use with the Mini V3 to convert main amplifier PSU to the required 5V DC, using a 18-75V TRACO Power DC-DC converter and to improve sound quality included an ESS 9023 hifi DAC. This PCB design was suitable in form, fit and function to used here too, mounted on a small aluminium bracket to fit perfectly in a space over the phono pre-amp stage:
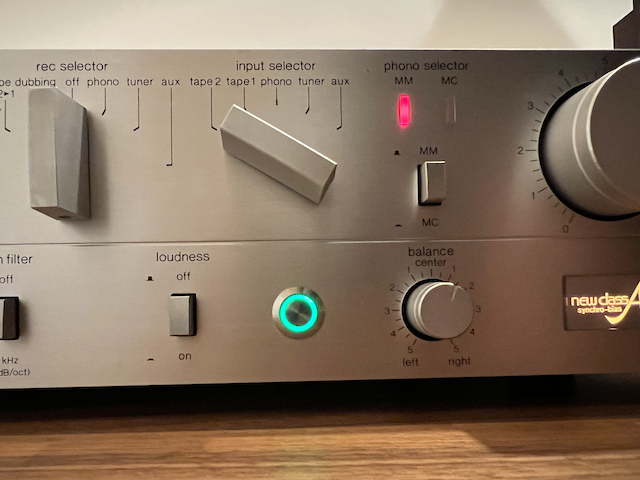
On the front panel a pushbutton was fitted with integral LED for resetting and indicating the Arylic streamer is connected to WiFi:
As two tape inputs are unlikely to be required anymore, the ‘tape 2’ input was repurposed to listen to the Mini V3 streamer.
The amplifier is in a metal case so needs external aerials so two are used one for WiFi and one for Bluetooth. To avoid creating a ground loop the WiFi aerial needing to be insulated from the chassis in this project.
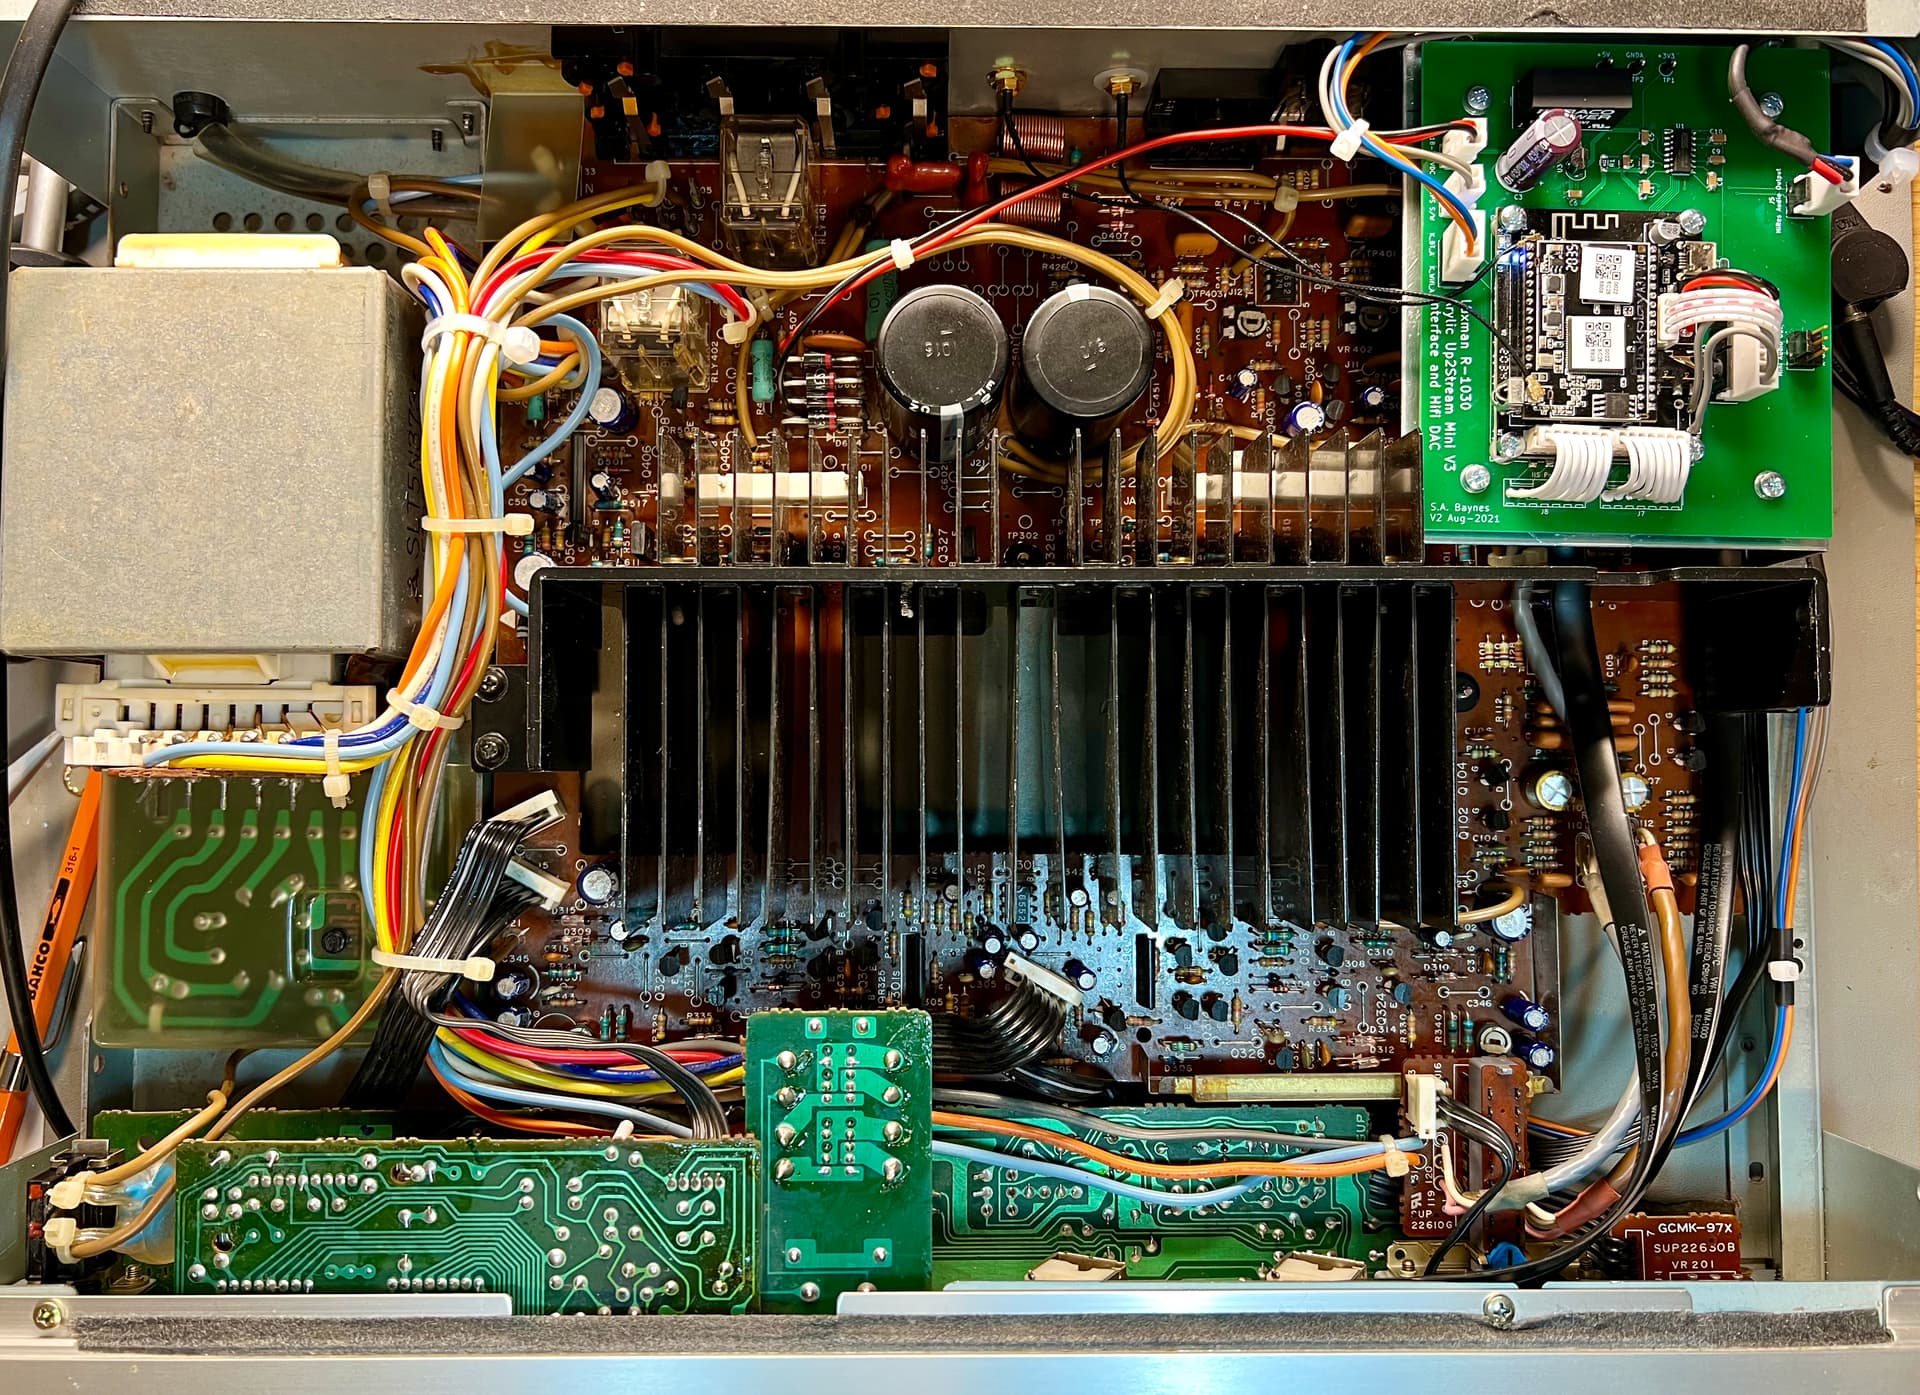
This is the internal view of the finished amplifier, all nice, tidy and OEM looking:
Once, finished repairing amplifiers the amplifier was subject to a series of test. Here are two: THD+N vs. Power output and frequency response using the auxiliary (line) input:
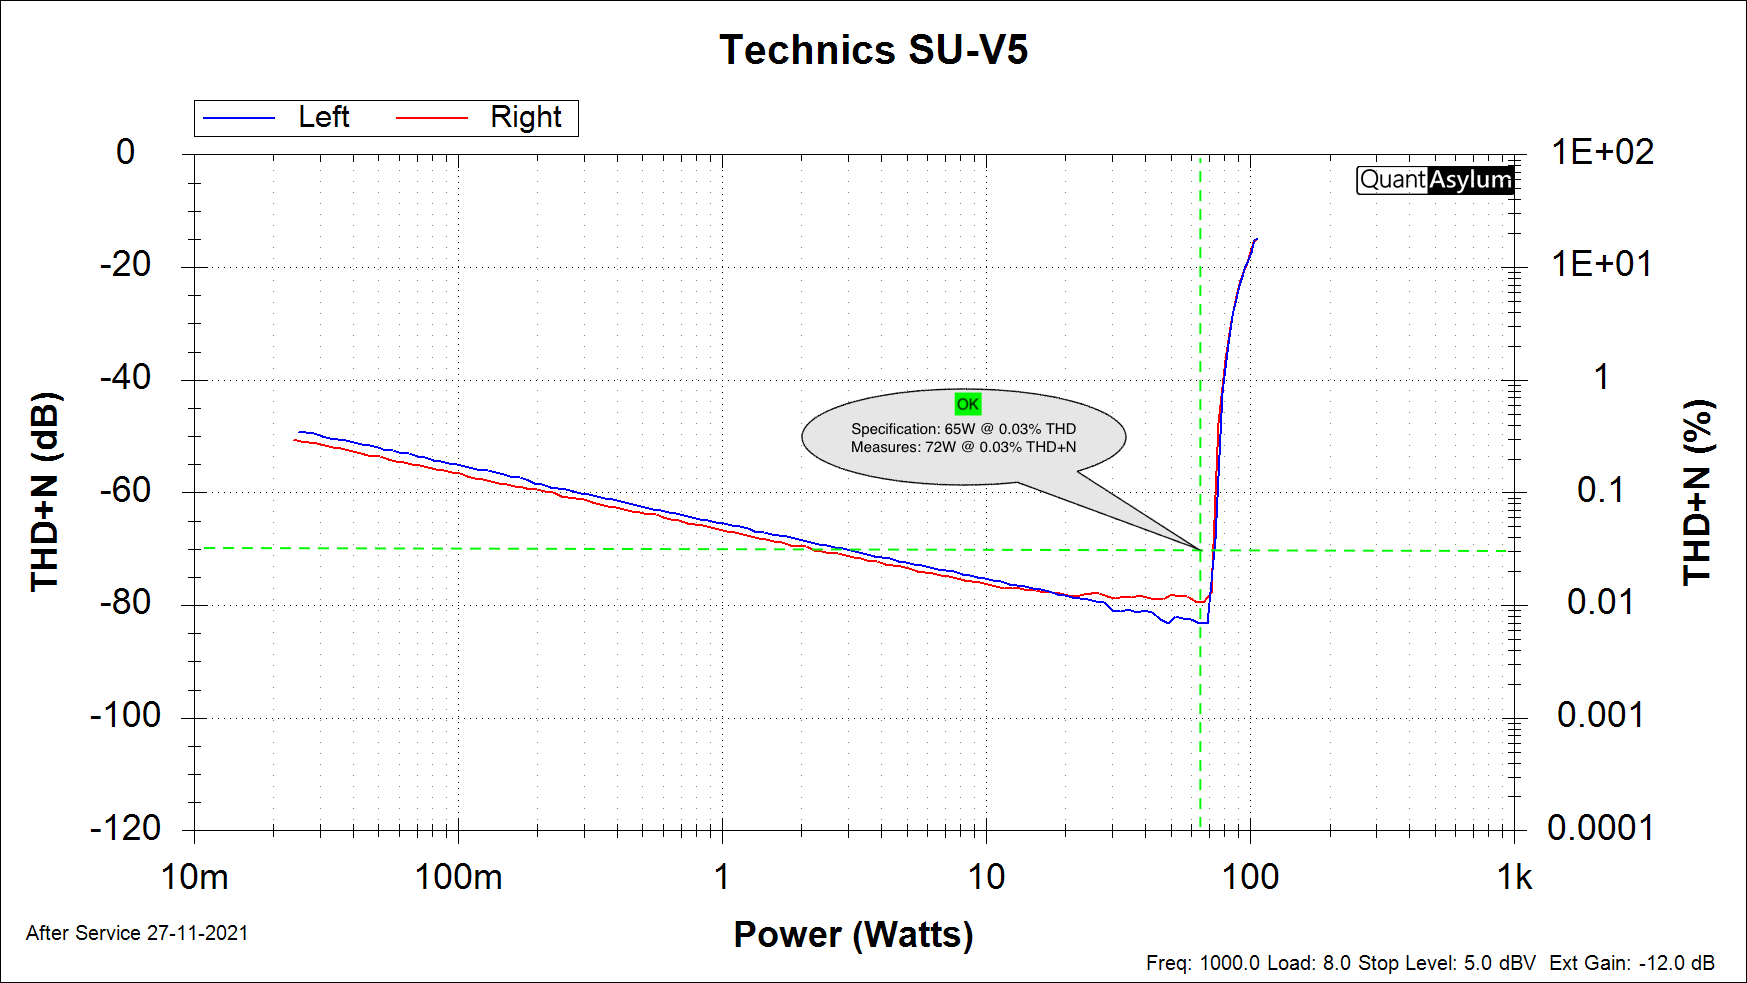
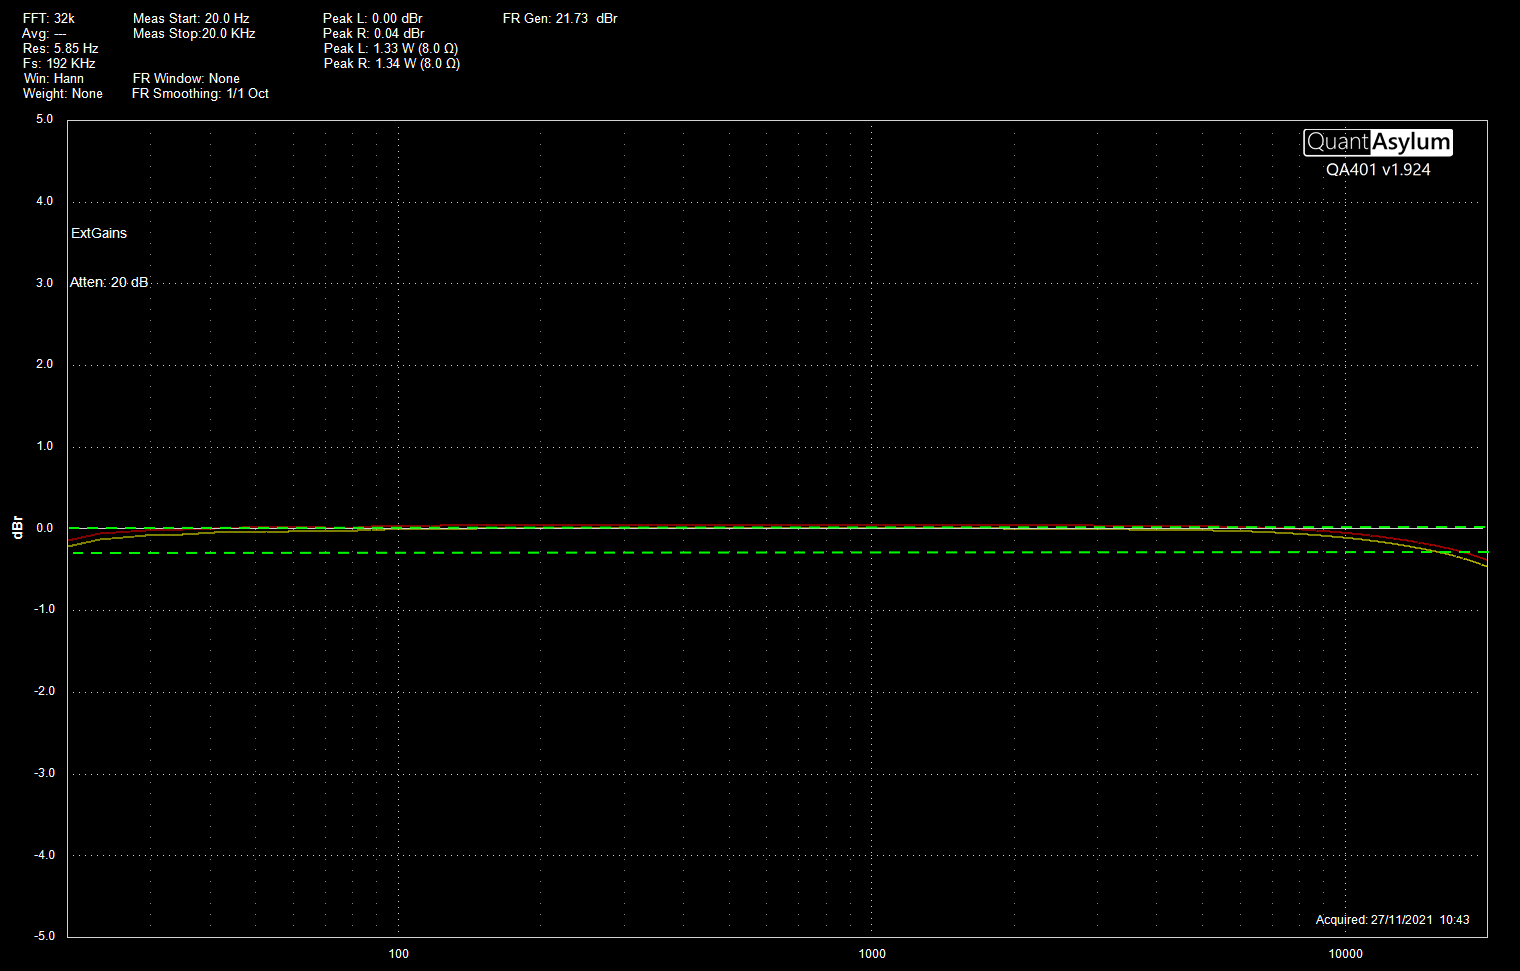
Distortion and power output are better than OEM spec, and the frequency response within a gnat’s whisker.
This was an enjoyable project with the end result sounding very good, with features brought up to date. Most importantly it saved yet another piece of electronic equipment from being consigned to the dump.
When the customer and his daughter came to pick it up, they were both extremely satisfied with how it looked and sounded, especially after the streamer demo.
The customer was so impressed, he decided he wanted a streamer adding into his Yamaha CR-800 which I was part way through repairing. The Yamaha will have to be the subject of another post ![]()